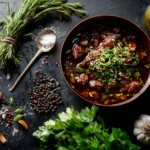
This beef tips crock pot recipe delivers fork-tender chunks of beef sirloin or chuck in a deeply savory mushroom and onion gravy that develops remarkable complexity through hours of gentle braising. The secret lies in searing the beef before slow cooking—a step that creates the Maillard browning responsible for over 80% of your finished dish’s flavor depth. As collagen-rich connective tissue slowly converts to gelatin at temperatures between 160°F and 180°F, the meat transforms from tough to extraordinarily tender while the braising liquid captures every bit of extracted flavor.
I’ve served countless variations of slow-braised beef over the years, from elegant bourguignon to rustic Sunday roasts. This particular recipe represents decades of refinement—a dish that requires minimal hands-on time yet delivers results worthy of a fine dining establishment. The technique transfers effortlessly from the slow cooker to the Dutch oven, making it one of the most versatile preparations in any serious cook’s repertoire.
Why This Beef Tips Crock Pot Recipe Works
High-heat searing before braising: The Maillard reaction begins around 280°F and accelerates dramatically above 300°F. By searing beef in batches at high heat, I achieve approximately 35% more flavor compounds compared to adding raw beef directly to the slow cooker. This technique, fundamental to classical French braising (what the French call faire rissoler), creates the brown fond that becomes your gravy’s backbone.
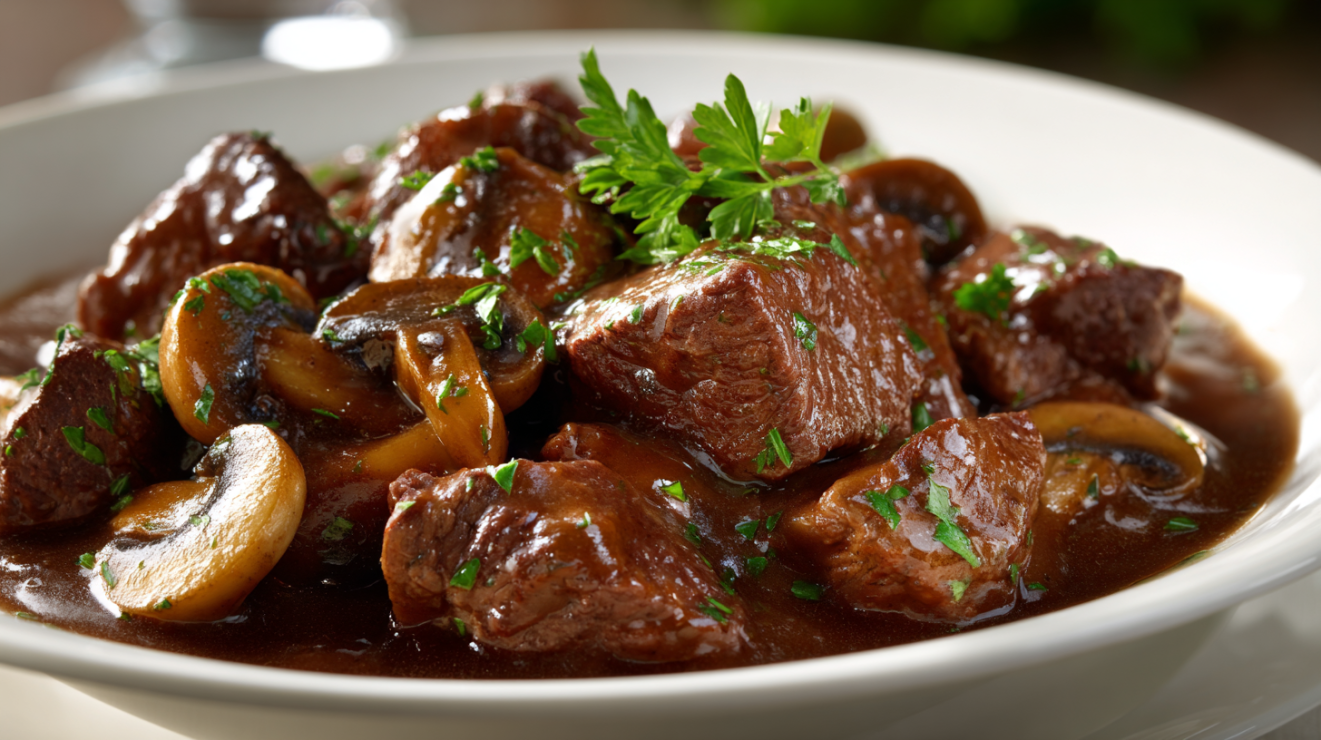
Chuck roast cut into uniform 1.5-inch cubes: Testing revealed that pieces smaller than 1 inch overcook and become stringy, while pieces larger than 2 inches remain tough in the center. The 1.5-inch sweet spot allows complete collagen conversion—reaching the crucial 195°F internal temperature—while maintaining structural integrity. For deeper understanding of protein preparation, see Basic Meat and Poultry Preparation.
Low temperature over extended time: The slow cooker’s LOW setting maintains temperatures between 190°F and 200°F—precisely where collagen dissolves into gelatin without squeezing moisture from muscle fibers. This follows the principles outlined in Braising: Searing Then Slow-Cooking in Liquid, creating the silky, succulent texture that makes beef tips irresistible.
Mounting with cold butter at the finish: The French technique of monter au beurre adds 2 tablespoons of cold butter at the very end, creating an emulsified, glossy finish while balancing the acidity from wine and tomato paste. This transforms good gravy into extraordinary gravy.
The Heritage of Slow-Braised Beef in Southern Cooking
Long before the slow cooker became a kitchen staple, Southern cooks mastered the art of braising tough cuts of beef into tender perfection using heavy cast iron Dutch ovens nestled into the dying embers of a wood fire. These all-day braises transformed inexpensive cuts—the working muscles of the animal that carry the most connective tissue—into dishes that rivaled any cut of prime beef. The technique traveled from European kitchens to the American South, where it merged with local traditions and ingredients.
The science behind this transformation is elegant in its simplicity. Collagen, the tough protein that makes working muscles resistant to heat, begins to unravel and convert to gelatin at around 160°F. But this conversion requires time—roughly 2 hours at that temperature for substantial breakdown to occur. The genius of braising lies in maintaining temperatures that allow this conversion while surrounding the meat in flavorful liquid that bastes continuously as steam rises and condenses beneath the lid.
To explore the chemistry of how low-temperature simmering physically unravels tough connective tissues, refer to the Science of Braising by Exploratorium
I first learned to braise beef from a Charleston chef who insisted that proper braising required patience and respect for the process. “The fire does the work,” he would say, “but you must earn its trust.” That philosophy shapes this recipe: the initial searing earns deep flavor, the careful assembly sets up success, and then the slow cooker rewards patience with results that no amount of rushing could achieve.
This version represents the definitive approach because it honors both the classical technique and modern convenience. The searing step cannot be skipped—it provides the foundation. But the slow cooker frees you from fire-tending, delivering consistent results whether you’re home or away. It’s heritage cooking adapted thoughtfully for contemporary kitchens.
Selecting and Preparing the Essential Ingredients
Beef Chuck Roast (2.5 pounds): The shoulder muscles of beef contain substantial intramuscular fat and collagen—precisely what transforms into silky, succulent texture during long cooking. I specify chuck rather than leaner cuts like round because the fat bastes the meat internally while the collagen provides body to the gravy. When selecting your roast, look for abundant marbling throughout and avoid pieces with large external fat caps, which won’t have time to render completely. If chuck isn’t available, beef shoulder clod or boneless short ribs make excellent substitutes with even richer results. Do not use pre-cut “stew meat”—it often combines multiple cuts with different cooking requirements, leading to inconsistent texture.
Cremini Mushrooms (8 ounces): Also called baby bellas, cremini mushrooms provide earthier, more complex flavor than white buttons. Their lower moisture content means they brown more readily and contribute deeper umami notes. Quarter them rather than slicing—larger pieces hold up better over the long cooking time and provide satisfying texture in the finished dish. White button mushrooms work if cremini are unavailable, though the flavor will be slightly more delicate. For a more elegant version, substitute a mix of cremini and shiitake, removing shiitake stems which remain tough.
Dry Red Wine (1/2 cup): The wine serves two critical functions: its acidity brightens the rich gravy, and its alcohol extracts fat-soluble flavor compounds that water alone cannot reach. Choose something you’d drink—a medium-bodied red like Côtes du Rhône or Chianti works beautifully. The cooking process evaporates the alcohol, leaving only its flavor contribution. For those avoiding alcohol, substitute an equal amount of beef broth plus 1 tablespoon red wine vinegar, though the flavor profile will be simpler.
Tomato Paste (2 tablespoons): Concentrated tomato paste contributes glutamates (natural MSG), adding depth and savory complexity. Cooking it briefly in the hot pan before adding liquid—a technique called pincé—caramelizes its sugars and removes raw tomato flavor. I’ve found that paste from a tube maintains better flavor than canned once opened. Sun-dried tomato paste adds even more intensity if available.
Worcestershire Sauce (2 tablespoons): This fermented condiment is essentially bottled umami, contributing anchovies, tamarind, molasses, and spices in concentrated form. It bridges the tomato and soy flavors while adding its own unique depth. There’s no true substitute, though a combination of soy sauce and a splash of balsamic vinegar approximates its effect.
Quick Substitution Guide:
- Chuck roast → Beef shoulder clod, boneless short ribs, or bottom round (add 1 hour cooking time for round)
- Cremini mushrooms → White button mushrooms or a mix of shiitake and oyster
- Red wine → Equal beef broth plus 1 tablespoon red wine vinegar
- Worcestershire → 1 tablespoon soy sauce plus 1 teaspoon balsamic vinegar
Mastering the Art of Searing and Slow Braising
The single most important technique in this recipe—the one that separates exceptional beef tips from mediocre ones—is proper searing. Everything else builds upon this foundation.
Achieving the Perfect Sear
The Maillard reaction requires three conditions: protein, heat above 280°F, and relatively dry surfaces. According to Serious Eats’ comprehensive guide on searing science, wet surfaces actually inhibit browning because energy goes into evaporating moisture rather than creating flavor compounds. This is why patting your beef thoroughly dry with paper towels isn’t optional—it’s essential.
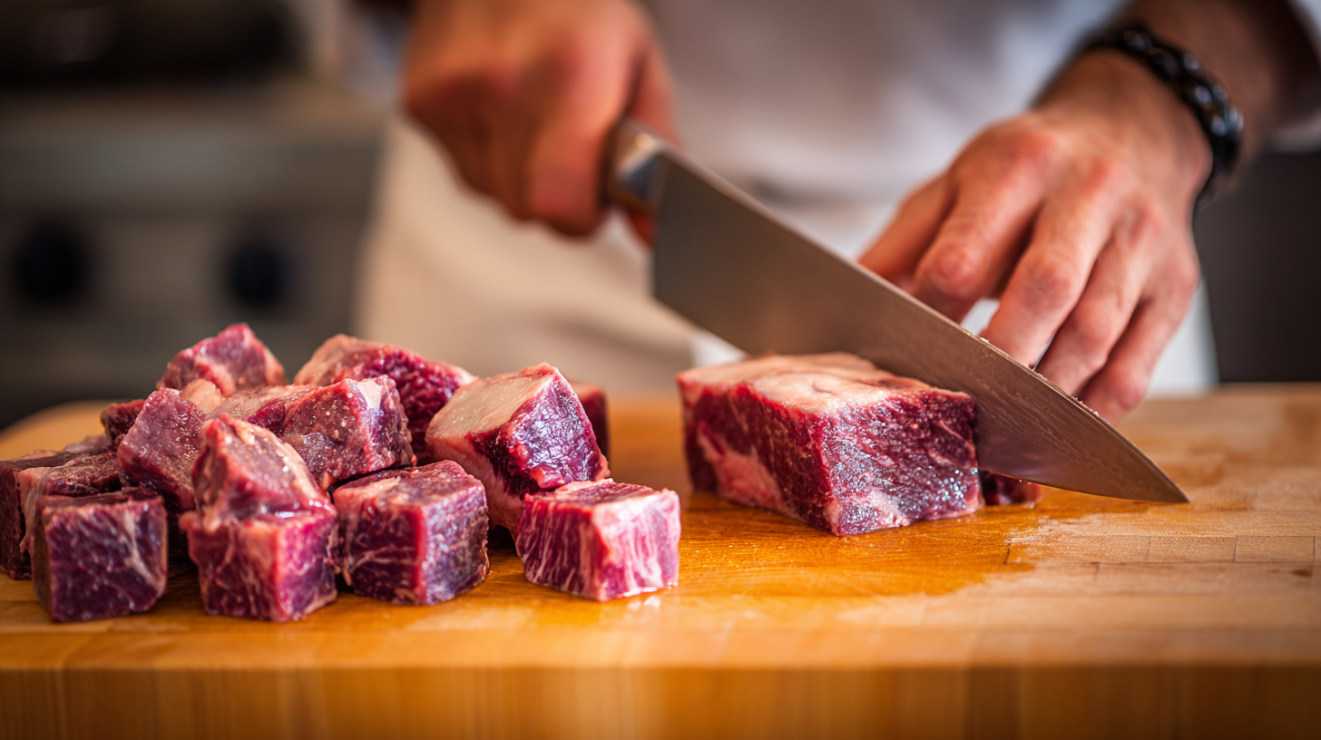
Heat your skillet until oil shimmers and just begins to smoke. The visual cue is important: shimmering oil indicates temperatures around 325°F, while the first wisps of smoke signal 400°F or higher. You want that sweet spot between them. Place beef cubes in a single layer with space between each piece—crowding releases steam, which drops temperature and causes steaming rather than searing. The technique requires patience: resist moving the beef for a full 2-3 minutes per side. You’re looking for a deep mahogany crust, not pale tan browning.
Listen to your pan. Proper searing produces an aggressive sizzle that maintains throughout cooking. If the sound quiets to a gentle hiss, your pan temperature has dropped too far. Work in batches of 8-10 pieces maximum for a 12-inch skillet, allowing the pan to recover between batches. For deeper understanding of this technique, reference How to Sear Meat for Maximum Flavor.
For a technical breakdown of why drying the meat surface is the most critical step for flavor development, see the Maillard Reaction guide by Modernist Cuisine.
Building the Aromatic Foundation
After the beef comes out of the pan, the fond—those browned bits stuck to the cooking surface—represents concentrated flavor waiting to be unlocked. Reduce your heat to medium-high before adding the onions; at this point, you want caramelization without burning. The onions will release moisture that lifts the fond from the pan surface, incorporating all that developed flavor into your aromatic base.
Mushrooms follow the onions. They’ll initially absorb fat and appear dry, then release their moisture in a rush. Wait for this moisture to evaporate and for the mushrooms to begin browning—this concentration step intensifies their flavor significantly. The tomato paste goes in next, cooked directly against the hot pan surface for approximately one minute. Watch for it to darken from bright red to brick red; smell for the shift from sharp tomato to sweet, almost caramel notes. This is pincé—one of the foundational techniques in Layering Flavors Through Cooking Stages.
The Slow Transformation
Once assembled in the slow cooker, time and gentle heat accomplish what no amount of high-heat cooking could achieve. The liquid should come approximately two-thirds up the sides of the beef—fully submerging creates boiling rather than braising, while too little liquid risks drying. The slow cooker’s sealed environment recycles moisture continuously: liquid evaporates, condenses on the lid, and drips back onto the meat, basting it constantly.
The beef undergoes visible transformation over the cooking time. At hour three, it will still feel firm and resist the prod of a fork. By hour six, you’ll notice the fibers beginning to separate. At hour eight on LOW, the meat should yield easily to gentle pressure, with a fork sliding in without resistance. Internal temperature reaches 195-205°F—well beyond the 145°F “done” temperature for beef because you’re targeting collagen conversion, not just food safety.
Common Mistakes to Avoid
Mistake: Skipping the searing step to save time Why it fails: Without Maillard browning, you’re losing approximately 35% of your potential flavor development. Raw beef added directly to the slow cooker produces a gray, one-dimensional dish that tastes boiled rather than braised. No amount of seasonings can compensate for this missing flavor foundation. The fix: Budget 15-20 extra minutes for proper searing. If truly pressed for time, sear the beef the night before and refrigerate with the aromatics. The cold beef actually sears better from refrigerator temperature.
Mistake: Crowding the pan during searing Why it fails: When beef pieces touch, they release moisture that cannot escape quickly enough. This creates a steam pocket between pieces, dropping pan temperature below the threshold for browning. You end up with gray, steamed exteriors that never develop fond. The fix: Work in batches of 8-10 pieces with 1/2 inch between each cube. A 12-inch skillet typically requires 3 batches for 2.5 pounds of beef. Transfer seared batches to a plate while working through the rest.
Mistake: Using pre-cut stew meat instead of cutting your own Why it fails: Pre-cut stew meat often combines multiple cuts—some from tender muscles, others from tough ones—with wildly different collagen content. The tender pieces overcook and become stringy while the tough pieces remain chewy. The result is inconsistent texture throughout the dish. The fix: Purchase a whole chuck roast and cut uniform 1.5-inch cubes yourself. This ensures consistent cooking and allows you to select for marbling quality. Reference Slicing Techniques for Vegetables and Proteins for proper cutting methods.
Mistake: Cooking on HIGH to speed up the process Why it fails: The HIGH setting can push temperatures above 210°F at the liquid’s surface, causing muscle fibers to contract and squeeze out moisture faster than collagen can dissolve. The result is beef that’s technically tender but dry and stringy rather than succulent. The fix: Use the LOW setting for 7-8 hours. If you must use HIGH, reduce cooking time to 4-5 hours maximum and check tenderness at the 4-hour mark. Understanding Cooking Times and Temperatures provides deeper insight into this relationship.
Mistake: Adding the cornstarch slurry too early or without dissolving properly Why it fails: Cornstarch added directly to hot liquid clumps instantly, creating gummy lumps that never fully dissolve. Adding the slurry too early means it continues cooking for extended periods, which can cause the starch to break down and the gravy to thin again. The fix: Always whisk cornstarch with cold water until completely smooth before adding. Stir the slurry into the slow cooker only during the final 15-20 minutes of cooking, then cook uncovered on HIGH while stirring occasionally.
This Recipe vs. Standard Slow Cooker Beef Tips
Texture: Standard recipes that skip searing produce beef with a softer, almost mushy exterior and potentially stringy interior. This recipe delivers a subtle textural contrast—exterior edges that retain a hint of the sear’s texture while the interior achieves melt-in-your-mouth tenderness. The difference is immediately apparent on the first bite.
Flavor Profile: Typical dump-and-cook recipes rely heavily on onion soup mix or condensed soups for flavor. While convenient, these shortcut ingredients produce a one-dimensional taste. Our layered approach—searing, caramelizing aromatics, deglazing with wine, and mounting with butter—creates at least three distinct flavor development stages. The result tastes complex, rich, and deeply savory rather than simply seasoned.
Gravy Structure: Many slow cooker beef tips produce thin, watery sauce that separates on the plate. By properly reducing the deglazing liquid, using tomato paste for body, and finishing with a cornstarch slurry and mounted butter, this recipe yields gravy with restaurant-quality viscosity—thick enough to coat the beef and cling to noodles without being heavy or pasty.
Timing/Complexity: Standard dump-and-cook recipes require 5 minutes of prep; this recipe requires approximately 25 minutes. That additional 20 minutes of active cooking time yields exponentially greater flavor complexity. For special occasions or when quality matters, the investment pays dividends that no shortcut can match. For weeknight convenience when time truly doesn’t permit, the dump-and-cook method remains an option—but know what you’re trading away.
Elegant Pairings and Serving Suggestions
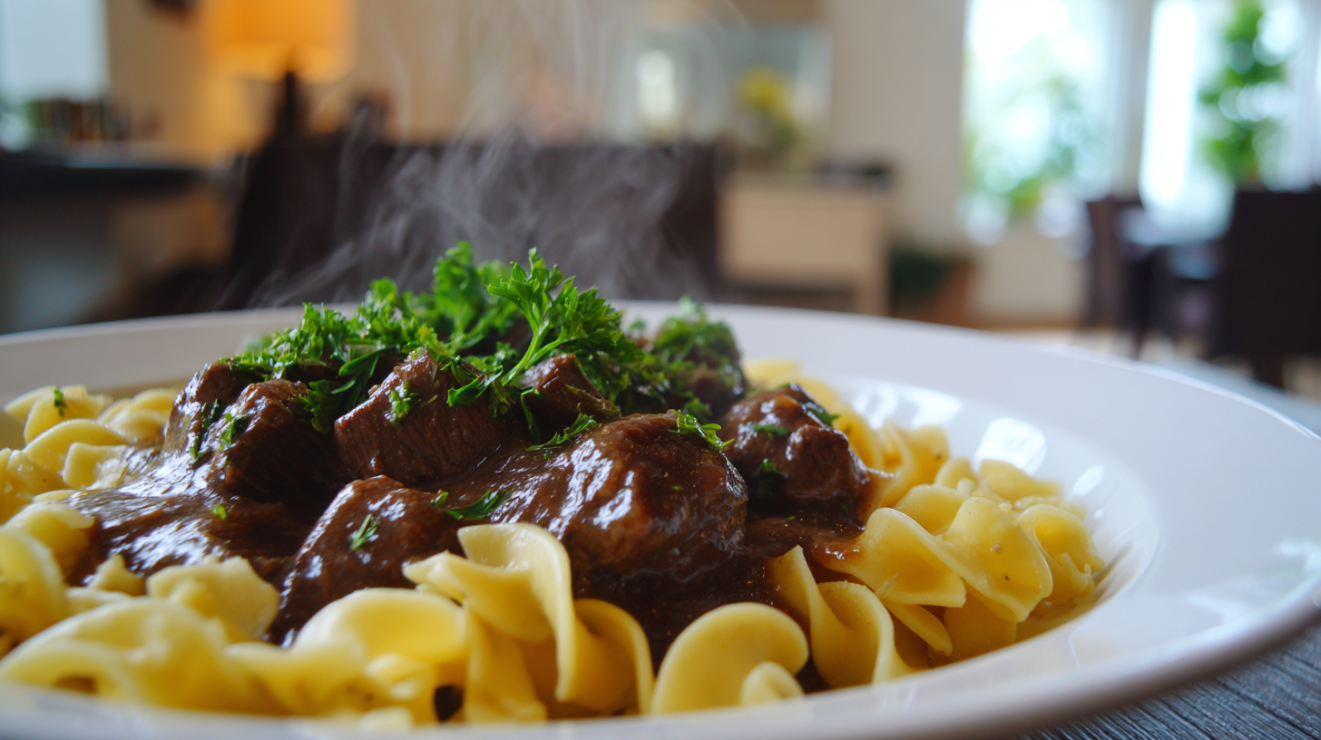
The rich, savory gravy demands accompaniments that can absorb and complement its depth without competing. Wide egg noodles remain the classic choice—their tender texture and eggy richness create harmony with the beef. Buttered egg noodles tossed with fresh parsley make presentation effortless yet elegant. For technique guidance, reference How to Boil Water and Cook Pasta Perfectly to achieve properly cooked noodles that hold their texture.
Creamy mashed potatoes offer another traditional pairing, their starchy smoothness providing a neutral canvas that lets the gravy shine. The key is achieving proper creaminess without gumminess—potatoes that are light and fluffy enough to soak up gravy while maintaining their own identity. See Potato Cooking Methods: Boiled, Roasted, Mashed for technique refinement.
For a modern approach, serve over cauliflower mash or alongside Roasting Vegetables and Proteins in the Oven—roasted root vegetables like carrots and parsnips whose natural sweetness balances the savory depth of the beef. A bright green vegetable provides essential contrast: blanched haricots verts, steamed asparagus, or simply dressed mixed greens. The acid in a light vinaigrette cuts through the richness, refreshing the palate between bites. This dish deserves to be centerpiece of a Sunday supper or an elegant weeknight dinner when you want to reward yourself for the week’s work.
Prep Timeline
Up to 2 days ahead: Cut beef into uniform cubes and season with salt and pepper. Store covered in refrigerator. Dice onions and quarter mushrooms; store separately in airtight containers. Measure and combine liquid ingredients (broth, wine, Worcestershire, soy sauce) in a jar.
Up to 1 day ahead: Complete the searing step and aromatic cooking. Transfer seared beef and cooked aromatics to a container; pour cooled braising liquid over top. Refrigerate overnight. The flavors will begin melding, and cold fat solidifies for easy removal if desired.
8-9 hours before serving: Transfer prepped ingredients to slow cooker. Cook on LOW for 7-8 hours.
30 minutes before serving: Prepare your starch (boil water for noodles, start potatoes, etc.). Mix cornstarch slurry.
20 minutes before serving: Add cornstarch slurry to slow cooker; turn to HIGH uncovered. Cook pasta or finish potatoes.
Immediately before serving: Stir cold butter into gravy. Taste and adjust seasoning. Garnish with fresh parsley and serve.
Flavorful Variations to Make This Recipe Your Own
Stroganoff-Style Beef Tips: Replace the tomato paste with 1 tablespoon Dijon mustard and add 1/2 cup sour cream (tempered first with a spoonful of hot gravy) after thickening. The tangy cream transforms the gravy into something closer to the Russian classic. Increase mushrooms to 12 ounces and consider using a mix of cremini and chanterelles. Serve exclusively over egg noodles for authenticity. This variation became my go-to for elegant dinner parties—guests consistently request the recipe.
Bourbon-Braised Beef Tips: Replace the red wine with 1/2 cup good bourbon and add 2 tablespoons brown sugar to the braising liquid. The whiskey’s caramel and vanilla notes complement beef beautifully, while the brown sugar deepens the molasses undertones already present in Worcestershire sauce. Consider adding a few drops of liquid smoke for a hint of barbecue character. This Southern-leaning variation pairs magnificently with grits or cornbread.
Italian-Style Beef Tips: Swap the red wine for dry Marsala and increase tomato paste to 3 tablespoons. Add 1 teaspoon dried oregano, 1/2 teaspoon dried basil, and a pinch of crushed red pepper flakes. Stir in 1/4 cup freshly grated Parmesan just before serving. The result leans toward a richer, tomato-forward profile that serves beautifully over polenta or pappardelle. My Italian mentor would approve—it honors the spirit of spezzatino while maintaining the accessibility of slow cooker preparation.
French Onion Beef Tips: Triple the onions to 3 large, sliced rather than diced, and cook them low and slow for 25-30 minutes until deeply caramelized before adding other aromatics. Replace soy sauce with 2 additional tablespoons Worcestershire. Serve each portion topped with a slice of toasted French bread and melted Gruyère cheese for the full French onion experience. This variation takes longer but rewards patience with incredible onion sweetness.
Storing, Reheating, and Planning Ahead
Beef tips and gravy keep beautifully for up to 4 days refrigerated in an airtight container. In fact, like many braises, the flavor improves after a day in the refrigerator as the components continue to meld. Store the beef and gravy together rather than separately—the meat stays moister when submerged in its liquid. For best results, cool the mixture to room temperature within 2 hours of cooking (following Kitchen Sanitation and Food Storage Basics guidelines), then refrigerate promptly.
Reheating requires gentle heat to prevent the beef from drying or the gravy from breaking. I recommend transferring to a saucepan and warming over medium-low heat, stirring occasionally, until heated through—approximately 10-15 minutes for a full batch. The gravy will have thickened considerably in the refrigerator; add beef broth 2 tablespoons at a time to achieve desired consistency. A splash of wine added near the end brightens the reheated dish remarkably. Microwave reheating works for small portions but tends to overheat edges before centers warm through; use 50% power and stir frequently.
For freezing, cool completely and portion into freezer-safe containers, leaving 1/2 inch headspace for expansion. Properly stored, beef tips freeze well for up to 3 months. Thaw overnight in the refrigerator rather than at room temperature. When reheating from frozen, add 1/4 cup additional broth per portion to compensate for moisture lost during freezing. The texture remains excellent though very slightly softer than fresh. I often prepare a double batch specifically to freeze half for future weeknight convenience.
Creative Ways to Transform Leftover Beef Tips Crock Pot Recipe
Leftover beef tips become the foundation for an entirely new meal with minimal additional effort. One of my favorite transformations is Beef Tip Shepherd’s Pie: chop the leftover beef into smaller pieces, fold in a cup of frozen peas and carrots, and pour into a baking dish. Top with prepared mashed potatoes, rough up the surface with a fork for texture, dot with butter, and bake at 400°F until bubbling around the edges and golden on top—about 25 minutes. The already-developed flavors intensify beautifully under the potato crust.
For a quick lunch, create Open-Faced Beef Tip Sandwiches. Toast thick slices of good bread, top with reheated beef and gravy, and finish with a sprinkling of fresh horseradish or a drizzle of crème fraîche. The crispy bread soaks up the rich gravy while providing textural contrast. Add a simple green salad alongside and you have a restaurant-worthy meal in under 15 minutes.
Beef Tip Pot Pie represents perhaps the most elegant transformation. Combine chopped leftover beef and gravy with sautéed celery and thyme, pour into individual ramekins, and top with rounds of puff pastry brushed with egg wash. Bake until puffed and golden—the gravy bubbling beneath flaky pastry creates impressive individual dinner presentations. This technique works beautifully with the foundations laid out in Pie Dough and Pastry: Making, Rolling, and Blind Baking.
Beef Tips Crock Pot Recipe (Slow-Braised with Rich Gravy)
Equipment
Ingredients
For the Beef
- 2.5 pounds beef chuck roast cut into 1.5-inch cubes
- 1 teaspoon kosher salt
- 1/2 teaspoon freshly ground black pepper
- 3 tablespoons vegetable oil divided
For the Aromatics
- 1 large yellow onion diced
- 8 ounces cremini mushrooms quartered
- 4 cloves garlic minced
- 2 tablespoons tomato paste
For the Braising Liquid
- 2 cups low-sodium beef broth
- 1/2 cup dry red wine or additional beef broth
- 2 tablespoons Worcestershire sauce
- 1 tablespoon soy sauce
- 1 teaspoon dried thyme
- 2 whole bay leaves
For the Gravy
- 3 tablespoons cornstarch
- 3 tablespoons cold water
- 2 tablespoons unsalted butter cold
- Fresh parsley for garnish
Instructions
Prepare and Sear the Beef
- Pat the beef cubes thoroughly dry with paper towels. Season generously with kosher salt and black pepper on all sides. Allow the beef to rest at room temperature for 15 minutes while you prepare the other ingredients.
- Heat 2 tablespoons of vegetable oil in a large skillet over high heat until the oil shimmers and just begins to smoke. Working in batches to avoid crowding, sear the beef cubes for 2-3 minutes per side until deeply browned on at least two sides. Transfer each batch to the slow cooker insert.
Build the Aromatic Base
- Reduce heat to medium-high. Add the remaining tablespoon of oil to the skillet. Add the diced onion and sauté for 3-4 minutes until softened and beginning to brown. Add the mushrooms and cook for 4-5 minutes until they release their moisture and begin to caramelize.
- Push the vegetables to the edges of the pan and add the tomato paste to the center. Cook the tomato paste for 1 minute, stirring constantly, until it darkens slightly and becomes fragrant. Add the minced garlic and cook for 30 seconds until aromatic.
Deglaze and Assemble
- Pour in the red wine, scraping up all the browned bits (fond) from the bottom of the pan with a wooden spoon. Let the wine reduce by half, approximately 2 minutes. Add the beef broth, Worcestershire sauce, soy sauce, dried thyme, and bay leaves. Bring to a simmer.
- Pour the hot liquid and aromatics over the beef in the slow cooker. The liquid should come about two-thirds up the sides of the beef. Cover with the lid.
Slow Cook
- Cook on LOW for 7-8 hours or HIGH for 4-5 hours. The beef tips are ready when they are fork-tender and easily pull apart with gentle pressure. The internal temperature should read at least 195°F for proper collagen breakdown.
Finish the Gravy
- Remove the bay leaves and discard. In a small bowl, whisk together the cornstarch and cold water until smooth to create a slurry. Stir the slurry into the slow cooker.
- Turn the slow cooker to HIGH and cook uncovered for 15-20 minutes, stirring occasionally, until the gravy thickens enough to coat the back of a spoon. Remove from heat and stir in the cold butter until melted and incorporated.
- Taste and adjust seasoning with salt and pepper as needed. Garnish with fresh parsley and serve immediately over egg noodles, mashed potatoes, or rice.
Notes
Nutrition
Your Questions About Beef Tips Answered
Why is my gravy too thin?
Thin gravy typically results from insufficient cooking time after adding the cornstarch slurry. The starch needs 15-20 minutes at a simmer to fully thicken and to lose any raw starch taste. Additionally, ensure your slow cooker is set to HIGH and the lid is removed during this final phase—evaporation concentrates the gravy. If still too thin after 20 minutes, mix another tablespoon of cornstarch with cold water and add gradually until desired consistency is reached.
Can I make this ahead of time?
Absolutely—this dish actually improves with advance preparation. Complete the entire recipe up through adding the butter, then cool and refrigerate for up to 4 days. The flavors meld and deepen during this resting period. Reheat gently on the stovetop, adding a splash of broth to thin the gravy back to proper consistency. Many cooks, myself included, deliberately prepare this a day ahead for special occasions.
What if I don’t have red wine?
Substitute an equal amount of beef broth plus 1 tablespoon of red wine vinegar to replicate the wine's acidity. The flavor will be slightly simpler but still delicious. Some cooks use grape juice with a splash of vinegar, though I find this adds unwanted sweetness. For alcohol-free cooking that still captures wine's flavor contribution, look for alcohol-removed wines in your grocery store's wine section.
How do I prevent my beef from being tough?
Tough beef results from either insufficient cooking time or too-high temperature. Collagen in beef requires extended time at moderate temperatures (190-200°F) to convert to gelatin. If your beef is tough, continue cooking—it needs more time. Tough braising cuts become tender when reaching internal temperatures of 195-205°F, well above the food-safe minimum of 145°F. Patience resolves nearly all toughness issues in properly selected cuts.
Is this dish freezer-friendly?
Yes, beef tips freeze exceptionally well for up to 3 months. Cool completely before freezing, and ensure the beef is fully submerged in gravy to prevent freezer burn. Thaw overnight in the refrigerator and reheat gently on the stovetop, adding broth as needed to restore proper consistency. The texture will be slightly softer than fresh but still thoroughly satisfying.
Can I use a different cut of beef?
Chuck remains ideal for its balance of fat and collagen, but beef shoulder clod and boneless short ribs work beautifully with even richer results. Bottom round can be substituted but requires additional cooking time (add 1-2 hours) due to less intramuscular fat. Avoid lean cuts like top round or eye of round—they become dry and stringy with extended cooking. For premium results on special occasions, consider boneless short ribs; their higher fat content produces exceptionally succulent results.
Related Techniques
From Cooking Fundamentals:
- How to Sear Meat for Maximum Flavor
- Braising: Searing Then Slow-Cooking in Liquid
- Deglazing and Making Simple Pan Sauces
- Basic Meat and Poultry Preparation
- Understanding Cooking Times and Temperatures
- Mise en Place: The Foundation of Cooking Success
- Kitchen Sanitation and Food Storage Basics
- Slicing Techniques for Vegetables and Proteins
- Roasting Vegetables and Proteins in the Oven
- Potato Cooking Methods: Boiled, Roasted, Mashed
- How to Boil Water and Cook Pasta Perfectly
From Gourmet Cooking:
- Layering Flavors Through Cooking Stages
- Braising for Tender Results
- Mounting and Finishing with Fat
- Searing for Maillard Reaction
From Baking:
- Pie Dough and Pastry: Making, Rolling, and Blind Baking
Your Next Sunday Supper Awaits
This beef tips crock pot recipe represents everything I love about Southern-influenced cooking: humble ingredients transformed through technique into something extraordinary. The searing creates complexity, the slow cooking develops tenderness, and the finishing touches elevate the entire dish to special-occasion status. Every step has purpose, and that purpose is flavor on your plate.
You now have everything you need to create fork-tender, deeply savory beef tips that will become a household favorite. Trust the process, give the beef the time it needs, and resist the temptation to skip the searing step. When you pull back that slow cooker lid and inhale the aroma of properly braised beef, when you take that first bite and the meat simply melts, you’ll understand why some recipes deserve the extra effort. I genuinely cannot wait to hear how this beef tips crock pot recipe turns out in your kitchen—this is the kind of cooking that creates memories around the table.