Master Home Cooking from Scratch
Welcome to the foundation of culinary excellence. This comprehensive curriculum outlines 58 essential courses that will transform you from a kitchen novice into a confident, competent home cook. Each course below represents a complete, in-depth guide designed to teach you not just what to do, but why you’re doing it—the reasoning behind every technique, the science behind every method.
At Chefts (Chef Technique Systems), we don’t just share recipes. We teach you how to think like a chef, troubleshoot like a professional, and build skills that compound over time. This isn’t about memorizing steps—it’s about understanding principles that apply to thousands of dishes. Master these fundamentals, and you’ll never need to wonder ‘what went wrong’ again.
SECTION 1: Kitchen Foundations
Building Your Culinary Safe Space
Before you ever turn on a burner or pick up a knife, you must understand kitchen safety. This isn’t just about following rules—it’s about developing habits that become second nature, protecting yourself and your loved ones from preventable accidents and illness. Every year, thousands of home cooks suffer injuries and food poisoning that could have been avoided with proper knowledge.
In this comprehensive guide, you’ll learn the critical safety protocols that professional kitchens demand: proper knife handling to prevent cuts, burn prevention when working with hot oils and surfaces, understanding cross-contamination and how to avoid it, recognizing the danger zone temperatures where bacteria multiply, and creating a safety-first mindset that doesn’t slow you down but actually makes you more efficient.
We’ll cover the most common kitchen accidents and how to prevent them, first aid basics every cook should know, and the food safety fundamentals that keep your family healthy. You’ll understand why certain practices matter—like why you should never put knives in soapy water, why falling knives have no handle, and why room temperature isn’t safe for most foods. This foundation ensures that everything you cook afterward is built on a platform of safety and confidence.
Walk into any cooking store and you’ll be overwhelmed by gadgets, each promising to revolutionize your cooking. The truth? You need far less than they want to sell you. This course cuts through the marketing noise to identify the truly essential tools that form the backbone of every functional kitchen—and explains exactly why each one matters.
We’ll start with the absolute non-negotiables: a quality chef’s knife (your most important tool), a paring knife for detail work, a large cutting board that won’t slip, a heavy-bottomed skillet that distributes heat evenly, a stockpot for soups and pasta, and basic measuring tools that deliver accuracy. You’ll learn what makes a good knife different from a mediocre one, why pan material matters more than price, and how to identify quality without overspending.
Beyond the basics, we’ll discuss when to upgrade, what specialty tools are worth considering once you’ve mastered fundamentals (like a dutch oven or immersion blender), and which trendy gadgets you can safely skip. This isn’t about building a professional kitchen—it’s about equipping yourself with tools that make cooking easier, more efficient, and more enjoyable. By the end, you’ll have a clear shopping list that fits your budget and your cooking ambitions.
A well-organized kitchen isn’t about aesthetics—it’s about efficiency, safety, and reducing the mental load of cooking. Professional kitchens are organized with obsessive precision because every second counts, and while you’re not running a restaurant, these same principles will transform your home cooking experience from chaotic to controlled.
This guide teaches you the triangle workflow concept that professional kitchens use: positioning your prep station, cooking station, and cleaning station for maximum efficiency. You’ll learn where to store your most-used tools for easy access, how to organize your ingredients so you can find everything at a glance, and how to create dedicated zones that prevent cross-contamination between raw and cooked foods.
We’ll cover practical strategies for small kitchens, discussing vertical storage solutions, how to maximize limited counter space, and ways to keep your workspace clear during cooking. You’ll understand why mise en place (having everything in its place) isn’t just for professionals—it’s the secret to stress-free cooking at home. By reorganizing your kitchen using these principles, you’ll spend less time searching and more time actually cooking.
Your stove and oven are the engines of your kitchen, yet most home cooks never truly learn how to use them properly. Each appliance has its quirks, hot spots, and limitations—and understanding these characteristics is the difference between food that’s perfectly cooked and food that’s burned outside and raw inside.
This comprehensive course explores the differences between gas, electric coil, smooth-top, and induction cooking, explaining the advantages and challenges of each. You’ll learn how to identify your oven’s hot spots (because no home oven heats perfectly evenly), when to use convection versus conventional settings, and what those mysterious oven modes actually do. We’ll demystify heat control—why ‘medium heat’ isn’t the same on every stove, how to recognize when your pan has reached the right temperature, and why preheating truly matters.
You’ll discover calibration techniques to test your oven’s true temperature (because those dials aren’t always accurate), learn to work with your specific equipment’s strengths rather than fighting them, and understand how altitude, humidity, and pan material affect cooking times. This isn’t about upgrading to expensive equipment—it’s about maximizing what you already have, compensating for its weaknesses, and using its strengths to your advantage.
A clean kitchen isn’t about impressing guests—it’s about preventing food poisoning, extending the life of your ingredients, and creating an environment where you can cook with confidence. Professional kitchens maintain rigorous sanitation standards not out of paranoia but because they understand the invisible dangers lurking in improperly handled food.
This course teaches the fundamentals that food safety inspectors check in restaurants: proper handwashing technique (it’s more than you think), sanitizing cutting boards and countertops effectively, preventing cross-contamination between raw proteins and ready-to-eat foods, and understanding the danger zone temperatures where bacteria multiply. You’ll learn proper refrigerator and freezer temperatures, safe cooling methods for leftovers, and how to organize your refrigerator to prevent forgotten food.
We’ll cover storage techniques that prevent spoilage: how to store different vegetables to maximize freshness, why some produce shouldn’t be refrigerated, proper meat and dairy storage, freezing foods for optimal quality, and how long leftovers actually last. You’ll understand visual and smell cues that signal spoilage and develop habits that keep your kitchen clean throughout cooking—not just after. This foundation of sanitation knowledge protects your family and ensures that the food you cook is safe.
SECTION 2: Knife Skills and Food Preparation
The Foundation of Kitchen Competence
- How to Hold and Handle a Chef’s Knife Safely
Your relationship with your chef’s knife is the most important skill in cooking. A knife is not just a tool—it’s an extension of your hand, and how you hold and control it determines both your safety and your efficiency. Most self-taught cooks develop habits that make knife work harder, slower, and more dangerous than it needs to be.
This foundational guide teaches the proper pinch grip used by professional chefs—a grip that provides maximum control, reduces hand fatigue, and dramatically improves cutting precision. You’ll learn the correct hand position that keeps your fingers safe while cutting, the rocking motion that makes mincing effortless, and the pushing or pulling techniques for different cuts. We’ll address common mistakes that lead to slipping and accidents.
Beyond the grip, you’ll understand knife handling safety: how to carry a knife properly, how to hand it to someone else safely, where to position your body relative to the cutting board, and developing the mindful awareness that prevents accidents. This course emphasizes muscle memory through practice, offering exercises to build comfort and confidence. Master this first, and every other knife skill becomes easier.
Chopping is the first knife skill you need to master, and it’s more nuanced than simply ‘cutting things smaller.’ The difference between rough chopping and careful chopping affects cooking time, texture, and how flavors develop. Uneven pieces mean some bits overcook while others remain underdone—a problem that no amount of seasoning can fix.
This guide distinguishes between rough chopping (for long-cooked dishes where pieces will break down), medium chopping (for even cooking in sautés), and fine chopping (for maximum surface area). You’ll learn the rhythmic motion that makes chopping efficient, how to use your guiding hand to stabilize ingredients safely, and techniques for items with irregular shapes like onions, carrots, and celery.
We’ll cover practical applications—understanding which dishes require which type of chop, recognizing when precision matters versus when approximation is fine, and developing speed without sacrificing safety. You’ll practice on forgiving vegetables before advancing to more challenging ingredients, building confidence and consistency. By mastering these basic chops, you establish the foundation for every cutting technique that follows.
Dicing is the knife skill that separates capable home cooks from those who struggle with consistency. Unlike chopping, which tolerates variation, dicing demands uniformity—every piece should be roughly the same size so everything cooks at the same rate. This precision transforms how your food cooks, ensuring even doneness and professional presentation.
This course breaks down the standard dice sizes: small dice (1/4 inch), medium dice (1/2 inch), and large dice (3/4 inch). You’ll learn the systematic approach that makes consistent dicing possible—stabilizing irregular vegetables, creating flat surfaces for safety, making parallel cuts, then rotating and cutting again to create uniform cubes. We’ll work through the classic example of dicing an onion, then apply these principles to potatoes, carrots, peppers, and other vegetables.
You’ll understand why dice size matters: how small dice releases moisture quickly (ideal for sauces), how large dice holds shape in long braises, and when to deviate from recipe instructions. You’ll practice identifying good dice versus mediocre dice, developing the visual standards that guide professional cooks. Dicing is tedious until it isn’t—and this guide gets you past that inflection point.
Mincing is the finest knife cut you’ll regularly use, creating tiny pieces that distribute flavor throughout a dish and virtually melt into sauces. Garlic, fresh herbs, ginger, and shallots all benefit from proper mincing—too coarse and they remain harsh, too rough and you’ve bruised rather than cut, releasing bitter compounds.
This course focuses on the technique that makes mincing efficient: the rocking motion where your knife tip never leaves the cutting board, your guiding hand stabilizes and gathers the pieces, and your wrist does most of the work. You’ll learn the specific challenges of different aromatics—how to peel and mince garlic without it sticking, how to prevent herbs from bruising and turning black, why ginger’s fibrous nature requires a different approach, and the secret to mincing shallots without tears.
We’ll address common frustrations: sticky garlic clinging to your knife, herbs that look mashed rather than minced, and achieving a truly fine mince without sacrificing flavor. You’ll understand when minced aromatics should be added to a dish (garlic at the end versus the beginning changes everything), and why spending time on a proper mince creates better-tasting food. This seemingly small skill disproportionately impacts flavor depth in everything you cook.
Slicing might seem straightforward, but the difference between mediocre and precise slicing is profound: even slices cook uniformly, look professional, and make eating more enjoyable. Ragged, uneven slices suggest carelessness and result in some pieces overcooked while others remain underdone.
This guide covers multiple slicing approaches: straight slicing for vegetables like cucumbers, angled (bias) slicing that creates more surface area for stir-fries, round vegetables like onions that require specific stabilization techniques, and the delicate approach needed for proteins where cutting against the grain versus with the grain determines tenderness.
You’ll learn the mechanics of achieving consistent thickness—controlling knife angle, maintaining steady pressure, using your knuckles as a guide. We’ll address slicing challenges: how to slice soft tomatoes without squashing them, how to create paper-thin slices without a mandoline, and techniques for slicing cooked meat. This course teaches you to match slicing technique to ingredient, resulting in professional-looking preparations every time.
Before you can cut vegetables, you must prep them properly—and this step is where many home cooks waste time, effort, or compromise quality. Knowing which vegetables need peeling, which benefit from trimming, and which require special cleaning techniques saves time and preserves maximum nutritional value and flavor.
This practical guide covers vegetable-by-vegetable preparation: carrots and potatoes that can be peeled or scrubbed depending on dish requirements, alliums like onions that require proper trimming, leafy greens that need thorough washing to remove grit, and vegetables like broccoli where proper trimming maximizes usable portions. You’ll learn efficient peeling techniques using both vegetable peelers and paring knives.
We’ll address common questions: whether organic vegetables need less peeling, how to tell when produce needs more aggressive trimming due to age, proper washing without degrading quality, and storage techniques for prepped vegetables. You’ll understand which vegetables can be prepped ahead and which must be cut just before cooking. This knowledge streamlines your cooking process, reduces waste, and ensures properly prepared ingredients every time.
Meat and poultry require different handling than vegetables—both for safety reasons and to achieve optimal cooking results. Improper preparation leads to tough, unevenly cooked proteins and increases food safety risks. Understanding how to trim, portion, and handle raw proteins properly sets you up for success before heat is even applied.
This course covers the basics every cook needs: trimming excess fat from beef and pork (leaving some for flavor), removing silverskin that toughens when cooked, portioning chicken breasts to even thickness for uniform cooking, handling raw chicken safely to prevent cross-contamination, and the critical step of patting meat dry before cooking to achieve proper browning.
We’ll discuss practical strategies: bringing meat to room temperature before cooking for more even doneness, when to butterfly or pound for faster cooking, how to tie roasts for even shape, and understanding grain direction for slicing after cooking. Safety protocols are emphasized throughout—proper cutting board use, immediate handwashing, sanitizing work surfaces, and storage temperatures that prevent bacterial growth. This knowledge transforms raw ingredients into properly prepared proteins ready for any cooking method.
- Fish and Seafood Handling Basics
Fish and seafood are the most delicate proteins you’ll work with, requiring a lighter touch and different preparation techniques than meat or poultry. Many home cooks avoid seafood not because they dislike it but because improper handling leads to disappointment—mushy texture, fishy smell, falling-apart disasters. Proper preparation is your key to success.
This guide teaches fish preparation fundamentals: selecting fresh fish at the market (clear eyes, firm flesh, ocean smell not fishy odor), removing pin bones using tweezers, determining whether to remove skin, portioning fillets evenly, and the gentle handling that prevents delicate fish from breaking. You’ll learn specific techniques for different seafood types—how to devein and peel shrimp efficiently, preparing scallops by removing the tough muscle, cleaning mussels and clams, and handling squid.
We’ll address unique safety considerations of seafood: faster spoilage rates than other proteins, proper refrigeration on ice, recognizing signs of spoilage before cooking, and understanding which species require more caution. You’ll practice working with fish carefully—supporting fillets properly when moving them, using a fish spatula designed for delicate proteins, and developing confidence to handle seafood without fear. This course demystifies fish preparation, transforming it from intimidating to manageable.
SECTION 3: Measuring and Recipe Fundamentals
Precision Where It Matters
- How to Measure Ingredients Accurately
Inaccurate measuring is one of the most common reasons home-cooked food fails to match recipe expectations. While experienced cooks can estimate, beginners need precision—especially in baking where ratios determine success. Understanding how to measure different ingredients correctly eliminates a major source of cooking frustration.
This course breaks down measurement techniques by ingredient type: dry ingredients like flour should be spooned and leveled (never packed unless specified), liquid ingredients measured in clear cups at eye level, and fats that require specific techniques depending on whether they’re solid or liquid. You’ll learn why a cup of flour can vary by 30% depending on measuring method, why most professional bakers weigh ingredients, and how to convert between volume and weight when recipes differ.
We’ll cover the equipment you need: dry versus liquid measuring cups (they’re not interchangeable), measuring spoons, and kitchen scales for precision. You’ll understand when precise measuring matters (baking, sauces with specific ratios) versus when approximation is fine (soups, braises), and develop the judgment to know the difference. This fundamental skill ensures that following a recipe actually produces expected results rather than leaving you confused about what went wrong.
- Reading and Understanding Recipes
Recipes are instructions, but they’re written in a language many home cooks don’t fully understand. Terms like ‘fold,’ ‘cream,’ ‘reduce,’ and ‘simmer’ have specific meanings that affect outcomes. Misunderstanding these terms leads to confusion, mistakes, and food that doesn’t match the recipe author’s intentions.
This guide teaches you to read recipes like a professional: identifying which steps can be done ahead versus which must happen just before serving, recognizing vague language that requires judgment, and understanding the structure—why ingredients are listed in order of use, what parenthetical information means, and how timing notes guide your cooking pace. You’ll learn to distinguish between critical steps that must be followed exactly and suggestions that allow flexibility.
We’ll decode common recipe shorthand and terminology, explaining not just what terms mean but why they matter. You’ll understand how to scale recipes up or down properly (it’s not always straightforward multiplication), recognize warning signs of poorly written recipes, and develop the ability to read between the lines—inferring details that experienced recipe writers assume you know. This course transforms recipes from mysterious instructions into clear roadmaps.
- Mise en Place: The Foundation of Cooking Success
Mise en place—a French term meaning ‘everything in its place’—is the single habit that most separates professional cooks from struggling home cooks. It’s the practice of prepping and organizing all ingredients and tools before you start cooking, and it transforms chaotic, stressful cooking into calm, controlled execution.
This course explains why mise en place matters profoundly: when a recipe tells you to sauté aromatics then immediately add liquid, you don’t have time to chop onions while garlic burns. You’ll learn the systematic approach professionals use—reading the entire recipe first, identifying all ingredients and equipment needed, prepping everything in advance, and only then turning on heat. We’ll discuss how to organize your mise en place logically: grouping ingredients that get added together, arranging them in order of use.
Beyond the mechanics, you’ll understand the psychological benefit—cooking with complete mise en place eliminates decision-making during cooking, reducing stress and allowing you to focus on technique. You’ll learn to estimate prep time realistically, develop efficient prep routines, and discover that spending 15 minutes organizing before cooking saves 30 minutes of chaos during. This habit fundamentally changes your cooking experience.
- Understanding Cooking Times and Temperatures
Recipe times are guidelines, not guarantees. Your oven runs hot, the recipe author’s oven ran cool, your chicken breast is thicker—dozens of variables affect actual cooking time. Learning to recognize doneness through multiple cues, rather than blindly following timers, transforms recipe-followers into real cooks.
This critical course teaches you to use all your senses to determine doneness: visual cues like color changes and caramelization, touch cues like firmness in meat, sound cues like the sizzle changing pitch, and aroma cues that signal development or burning. You’ll learn reliable indicators for different foods—how chicken changes from translucent to opaque, how internal temperature reliably indicates safety, why pasta should be tested by tasting, and how carryover cooking means removing food from heat before it reaches target doneness.
We’ll cover the essential tool every serious cook needs: an instant-read thermometer, discussing which temperatures ensure safety, which create optimal texture, and how different proteins have different targets. You’ll understand variables that extend cooking time (cold ingredients, high altitude, humid environments) and those that shorten it (powerful burners, dark pans, convection). This course builds the judgment that lets you adapt recipes to your equipment and ingredients.
- Seasoning Basics: Salt, Pepper, and Building Flavor
The difference between bland food and delicious food often comes down to proper seasoning—not just adding salt at the end, but building and layering flavors throughout the cooking process. Most home cooks under-season significantly, either from fear or from not understanding how salt transforms food at different stages.
This foundational course explores the primary seasoning every cook must master: salt. You’ll learn why kosher salt is preferred by professional cooks, how different salt types have different strengths, and the concept of seasoning in layers—adding salt during cooking rather than just at the end brings out inherent flavors. We’ll discuss the science of salt: how it enhances natural flavors, when to salt meat (before, during, or after cooking), and why salting at different stages affects texture in addition to taste.
Beyond salt, you’ll understand black pepper’s role (when to add it for different effects), the balance between salt and acid that creates complexity, and the concept of seasoning to taste—tasting throughout cooking and adjusting gradually. You’ll learn to recognize under-seasoned food and develop the confidence to season boldly without over-salting. This course emphasizes that seasoning isn’t about following exact measurements but developing your palate. Master this, and every dish will taste more vibrant, more complete, more professional.
SECTION 4: Understanding Heat and How Food Cooks
The Science That Makes You a Better Cook
- How Heat Transforms Food
Cooking is applied chemistry—heat causes proteins to denature, starches to gelatinize, sugars to caramelize, and water to evaporate. Understanding these transformations at a basic level changes how you approach every cooking task, explaining why certain techniques work and others fail. This isn’t about memorizing complex science; it’s about developing intuition based on what’s actually happening to your food.
This course breaks down the primary ways heat affects food: protein coagulation (why meat firms up and eggs set), starch gelatinization (why pasta absorbs water and thickens sauces), caramelization and Maillard reaction (the complex flavors that develop when food browns), and water evaporation (concentration of flavors and changes in texture). You’ll understand why high heat creates crispy exteriors while low heat tenderizes tough cuts, why some vegetables become sweeter when cooked, and why proper heat control prevents food from becoming tough or mushy.
We’ll explore practical applications: why steaming vegetables preserves color better than boiling, why searing meat doesn’t actually ‘seal in juices’ but does create incredible flavor, how different temperatures create different textures in eggs, and why resting meat matters. This scientific foundation demystifies cooking, replacing superstition with understanding. When you know why things work, you can troubleshoot problems, adapt techniques, and make informed decisions rather than blindly following rules you don’t understand.
- Moist Heat vs. Dry Heat Cooking
All cooking methods fall into two categories: moist heat (using water, steam, or liquid) and dry heat (using hot air, hot metal, or hot fat). Understanding this fundamental division helps you choose the right technique for different ingredients and desired outcomes—tender vegetables need different treatment than tough meat cuts.
This guide explores moist heat methods first: boiling, simmering, steaming, poaching, braising, and stewing. You’ll learn when moisture benefits food (tenderizing tough connective tissue, preventing drying, cooking grains) and the limitations of moist heat (can’t create crispy textures, dilutes flavors unless managed properly). We’ll discuss how liquid temperature affects cooking—gentle simmering versus aggressive boiling—and when to cover versus leave uncovered.
Then we’ll explore dry heat methods: sautéing, pan-frying, roasting, baking, broiling, and grilling. You’ll understand when dry heat excels (creating crusty exteriors, concentrating flavors, developing browning reactions) and its challenges (requires more attention, easier to overcook delicate items). Most importantly, you’ll learn that many recipes combine both approaches—searing meat then braising—and understand why this combination often produces superior results. This course builds the framework for choosing cooking methods intelligently based on ingredient and desired outcome.
- Understanding Carryover Cooking and Resting
One of the most counterintuitive aspects of cooking is that food continues cooking after you remove it from heat—a phenomenon called carryover cooking. This internal heat, already absorbed into the food’s mass, keeps working even off the stove. Failing to account for carryover is why your ‘medium-rare’ steak becomes medium, your chicken breast dries out, and your roasts overcook in the center.
This critical course explains the science: larger pieces of food have more mass and higher internal temperatures, meaning more dramatic carryover (a large roast can rise 10-15°F after removal). You’ll learn the general rule of removing proteins from heat 5-10 degrees below target temperature, understanding that thinner cuts carry over less than thick cuts, and why high-heat cooking causes more carryover than low-heat cooking. We’ll discuss resting—the necessary pause that allows juices to redistribute throughout the meat rather than flooding out when you cut immediately.
You’ll understand practical applications: why restaurant steaks are often removed from the grill seeming ‘underdone’ yet arrive perfect, how to prevent dry chicken breast by accounting for carryover, and why smaller portions need shorter resting times. This course teaches patience—resisting the urge to cut into that steak immediately—and develops the judgment to know exactly when to remove food from heat for perfect final doneness. Account for carryover cooking, and you’ll never overcook expensive proteins again.
- How to Tell When Food Is Properly Cooked
Recipes give cooking times, but times are approximations affected by dozens of variables. Real cooks don’t time their food—they recognize doneness through multiple indicators: sight, touch, sound, smell, and temperature. Developing this multi-sensory awareness separates recipe-followers from confident cooks who consistently produce perfectly cooked food.
This guide teaches doneness indicators for every major food category: proteins that change color and firmness, starches that soften and absorb liquid, vegetables that become tender with the right texture, and baked goods that develop structure and color. You’ll learn reliable cues—why pressing meat with your finger tells you its doneness (comparing the feel to different parts of your hand), how the sizzle sound changes when moisture evaporates, why visual cues like opacity indicate protein cooking, and when thermometers provide the most reliable information.
We’ll address specific challenges: testing fish doneness (the flaking point), determining when vegetables are ‘tender’ versus ‘mushy,’ recognizing the stages of egg cooking from runny to hard-boiled, and understanding visual cues in baking like golden color and risen structure. You’ll practice developing your instincts, learning to trust your observations rather than blindly following timers. This course builds the observational skills that let you cook confidently, adjusting on the fly based on what you see, feel, and hear.
- Managing Cooking Temperature: Low, Medium, and High Heat
Recipe instructions like ‘cook over medium heat’ are maddeningly vague because every stove is different. What feels like medium on a powerful gas range is scorching on an older electric coil, and recognizing when you’re at the right temperature—and knowing how to adjust if you’re not—is a skill that dramatically improves your cooking success rate.
This course teaches you to identify heat levels through observation rather than dial settings: high heat makes oil shimmer and smoke quickly, creates instant sizzle when food hits the pan, and is used for searing and stir-frying. Medium heat allows steady sizzling without immediate browning, appropriate for sautéing vegetables, cooking chicken through, and building fond gradually. Low heat barely bubbles liquids, gently warms rather than cooks quickly, and is essential for delicate tasks like making custards or preventing garlic from burning.
You’ll learn adjustment techniques: recognizing when your pan is too hot (smoking oil, burning aromatics) and too cold (food steams instead of browns, releases water). We’ll discuss how pan material affects heat retention and responsiveness, why preheating matters for consistent results, and the skill of temperature modulation throughout cooking. This course demystifies heat control, giving you the confidence to adjust your stove’s output based on what you observe, ensuring consistent results regardless of your equipment.
- Preheating and Why It Matters
Preheating your pan or oven isn’t just a suggestion—it’s essential for consistent cooking results. When you add food to a cold pan or put a dish in a cool oven, you’re fundamentally changing how heat transfers and how your food cooks. Understanding why preheating matters, when it’s critical, and when you can skip it separates methodical cooks from frustrated ones wondering why recipes don’t work.
This course explains the science: when you place food in a properly preheated pan, the sudden contact with hot metal creates immediate searing, developing flavor through Maillard reactions and preventing sticking. A preheated oven ensures that baked goods rise properly, roasted vegetables caramelize rather than steam, and cooking times match recipe expectations. Without preheating, food spends too long at intermediate temperatures where nothing good happens—proteins toughen without browning, starches don’t develop texture, and vegetables release moisture without concentration.
You’ll learn practical techniques: how to test if your pan is ready (the water droplet test), how to verify oven temperature with a thermometer (because dials lie), understanding thermal mass in heavy pans versus light ones, and recognizing exceptions where preheating doesn’t apply (slow braises starting from cold, specific baking techniques). We’ll discuss common mistakes: overheating and burning, underheating and steaming, and the timing of adding oil to preheated pans. This knowledge ensures every recipe starts from the right baseline temperature, dramatically improving your success rate.
SECTION 5: Fundamental Cooking Methods – Moist Heat
Water-Based Cooking Techniques
- Boiling and Simmering: The Foundation of Cooking
Boiling and simmering are the first cooking techniques humans mastered, and they remain essential in modern kitchens. Yet many home cooks don’t understand the difference between a rolling boil, a gentle boil, and a proper simmer—distinctions that dramatically affect cooking outcomes. These fundamental moist-heat methods form the basis for countless dishes.
This comprehensive guide defines each level precisely: a rolling boil (212°F/100°C at sea level) creates large bubbles that vigorously break the surface, used for pasta, blanching vegetables, and reducing liquids quickly. A gentle boil produces smaller, slower bubbles, appropriate for stocks where you want extraction without clouding. A simmer (around 185-205°F) shows tiny bubbles occasionally breaking the surface, ideal for delicate proteins, developing flavors over time, and preventing toughening.
You’ll learn when each technique applies: why pasta needs a rolling boil to circulate properly, why stocks should never boil vigorously (it creates cloudy, greasy liquid), why braised meats simmer rather than boil (boiling toughens proteins while simmering tenderizes), and how altitude affects boiling temperature. We’ll cover lid management: when covering concentrates heat and moisture, when leaving uncovered allows reduction and concentration. This course establishes the foundation for all water-based cooking, teaching you to recognize and control liquid temperature for optimal results.
- How to Boil Water and Cook Pasta Perfectly
It sounds absurdly basic, but properly boiling water and cooking pasta correctly are skills many home cooks never truly master. Sticky, clumpy pasta with sauce that won’t adhere is usually the result of improper boiling technique—not the pasta itself. This course takes what seems simple and reveals the details that create perfect results every time.
You’ll learn the proper sequence: starting with sufficient water (4-6 quarts per pound of pasta—less water means sticky pasta), salting the water generously after it boils (your only chance to season the pasta itself), waiting for a full rolling boil before adding pasta, stirring immediately to prevent sticking, and maintaining that boil throughout cooking. We’ll discuss why salting earlier doesn’t save time, why you shouldn’t add oil to the water (it prevents sauce from adhering), and why breaking pasta to fit smaller pots compromises texture.
The crucial skill is determining doneness: we’ll explain al dente (literally ‘to the tooth’), why tasting is the only reliable method, why pasta continues cooking after draining, and the technique of reserving pasta water to adjust sauce consistency. You’ll understand why Italian cooks finish pasta in the sauce, how starchy pasta water creates silky sauce, and why immediately draining then leaving pasta to sit creates gummy disasters. Master this fundamental technique, and you’ve mastered a cooking method you’ll use hundreds of times every year.
- Steaming Vegetables and Proteins
Steaming is one of the gentlest, most versatile cooking methods—preserving nutrients, maintaining vibrant color, and cooking food through without added fat. Yet many home cooks either overcook vegetables to mush or undercook them to crunchy disappointment. Understanding how steam transfers heat, how different foods respond to steaming, and when steaming is the best choice dramatically expands your cooking capabilities.
This course covers steaming fundamentals: how steam transfers heat more efficiently than boiling water (it’s actually hotter), why steamed vegetables maintain better texture and color than boiled ones, and why proteins like fish and dumplings steam beautifully without drying. You’ll learn equipment options from dedicated steamers to improvised setups with collapsible baskets or bamboo steamers over boiling water, understanding that as long as food sits above boiling water in a covered environment, you’re steaming effectively.
We’ll address technique details: preventing waterlogging by keeping food above the water line, arranging food in a single layer for even cooking, understanding timing differences (delicate greens need 2-3 minutes while dense root vegetables need 10-15), and testing doneness by touch and appearance. You’ll learn when to season before steaming (proteins) versus after (vegetables), how to infuse flavor using aromatics in the steaming liquid, and why covering immediately after steaming prevents color loss. This gentle method produces consistently excellent results when you understand its principles.
- Blanching and Shocking: Preserving Color and Texture
Blanching—briefly boiling food, then immediately plunging it into ice water (shocking)—is a restaurant technique that home cooks often skip, not realizing how much it improves results. This two-step process sets color, controls texture, removes bitterness, and allows you to prep vegetables hours ahead without quality loss. It’s the secret behind those perfectly vibrant, crisp-tender vegetables you see in professional kitchens.
This course explains the method precisely: bringing a large pot of well-salted water to a rolling boil, adding vegetables in small batches to maintain temperature, cooking for just 30 seconds to 3 minutes depending on the vegetable, then immediately transferring to a bowl of ice water to stop cooking. You’ll learn why this works: brief boiling sets the chlorophyll in green vegetables, preventing the dull olive color that develops with long cooking, while the ice bath halts enzymatic reactions and locks in texture.
You’ll discover applications beyond color preservation: blanching tomatoes to easily remove skins, blanching bones before making stock to remove impurities, blanching bitter vegetables like broccoli rabe to moderate strong flavors, and prep-ahead strategies for dinner parties where vegetables are blanched earlier then quickly sautéed just before serving. We’ll cover timing for different vegetables (delicate asparagus versus dense carrots), recognizing proper blanching (color intensifies then brightens), and storage after shocking. This technique elevates your vegetable cooking from amateur to professional with minimal additional effort.
- Poaching: Gentle Cooking in Liquid
Poaching is the most delicate moist-heat cooking method, using liquid below simmering temperature to gently cook proteins and fruit without agitation. This technique produces extraordinarily tender results—silky poached eggs, moist chicken breast, delicate fish that doesn’t fall apart—but it requires careful temperature control and understanding when gentle heat is preferable to aggressive heat.
This guide covers the principles: maintaining liquid at 160-180°F where small bubbles form on the bottom but don’t break the surface, understanding that this temperature range cooks proteins to safe temperatures without toughening, and recognizing that poaching takes longer than higher-heat methods but rewards patience with superior texture. You’ll learn equipment needs (a wide, shallow pan for eggs, a deeper vessel for chicken), liquid options (water, stock, wine, milk), and how to infuse flavor during poaching with aromatics.
We’ll work through classic applications: poached eggs where timing and water temperature determine runny versus set yolks, poached chicken breasts that remain juicy rather than drying out, poached fish that stays intact rather than flaking into fragments, and poached fruit for elegant desserts. You’ll understand when poaching is ideal (delicate proteins, low-fat cooking), when it’s impractical (foods that benefit from browning), and how to troubleshoot problems like eggs with ragged whites or chicken that overcooks before the center is done. This gentle technique adds a valuable tool to your cooking repertoire.
- How to Make Basic Stock from Scratch
Stock is the liquid foundation of countless soups, sauces, braises, and risottos—the backbone of flavor that separates good cooking from great cooking. While store-bought stock is convenient, learning to make your own from leftover bones, vegetable scraps, and aromatics transforms kitchen waste into liquid gold, builds deeper understanding of flavor development, and costs pennies per quart.
This comprehensive course teaches stock-making fundamentals: starting with bones (chicken, beef, fish) or vegetables, covering them with cold water, bringing slowly to a bare simmer (never boiling, which creates cloudy, greasy stock), and maintaining that gentle simmer for hours to extract maximum flavor and gelatin. You’ll learn the classic aromatics every stock needs—onions, carrots, celery, bay leaves, peppercorns—and why adding them at different stages affects flavor intensity.
We’ll cover different stock types and their uses: light chicken stock for soups and sautés, dark beef stock for braises and gravies, fish stock for seafood dishes, and vegetable stock for vegetarian cooking. You’ll understand the importance of starting with cold water (extracts more flavor), skimming impurities during cooking (produces clear stock), and straining carefully for pristine liquid. We’ll discuss storage (freezing in ice cube trays for portion control), reduction for concentrated flavor, and transforming stock into rich demi-glace. This foundational skill elevates every dish that uses liquid.
- Simple Soup Making Techniques
Soup is one of the most forgiving dishes you can make—a blank canvas for learning how to build flavors, adjust consistency, and balance seasonings. Yet many home cooks make weak, watery soups because they don’t understand the foundational techniques: proper sautéing of aromatics, layering flavors, knowing when to add ingredients, and how to finish soups with richness and depth.
This course walks through the universal soup-making method: starting by sautéing aromatics (onions, celery, carrots) in fat to build flavor foundation, adding spices or tomato paste to bloom their flavors, deglazing with liquid to capture fond, adding stock or water with main ingredients, simmering gently until everything is tender, and finishing with seasonings and enrichments. You’ll learn why this sequence matters and how varying it changes outcomes.
We’ll explore different soup categories: clear soups like chicken noodle where clarity and clean flavors matter, pureed soups where blending creates silky texture, chunky vegetable soups where ingredient size affects eating experience, and cream soups where dairy adds richness. You’ll understand how to adjust consistency (more stock to thin, reduction or starch to thicken), when to add delicate ingredients like leafy greens (at the end), and the transformative power of final seasoning, fresh herbs, acid, and garnishes. This course makes soup-making approachable and successful every time.
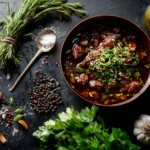
- Stewing: Low and Slow in Liquid
Stewing is the technique that transforms tough, inexpensive cuts of meat into fall-apart tender dishes through long, gentle cooking in flavorful liquid. While stewing requires patience (often 2-3 hours), it’s remarkably forgiving—difficult to overcook—and creates deeply flavored, satisfying one-pot meals. Understanding how collagen breaks down into gelatin, how flavors meld over time, and how to manage liquid levels unlocks the magic of stews.
This guide explains the stewing process: browning meat in batches to develop fond (the flavorful browned bits), sautéing aromatics and vegetables in that same pan, adding liquid (stock, wine, tomatoes) to barely cover the ingredients, bringing to a simmer, then cooking covered at low temperature until meat is tender. You’ll learn why browning matters (creates depth through Maillard reactions), why searing in batches prevents steaming, and how to capture every bit of flavor stuck to the pan bottom.
We’ll cover different stew styles: French-style beef bourguignon with red wine, Irish-style stew with lamb and root vegetables, Southwest-style chili with beans and spices, and understanding how liquid ratio, temperature, and time work together. You’ll learn to identify when meat is tender (it should pull apart easily), how to thicken too-thin stews, how to adjust seasoning at the end when flavors have concentrated, and why stews often taste better the next day. This low-stress cooking method produces impressive results with minimal technique.
SECTION 6: Fundamental Cooking Methods – Dry Heat
Fat and Air-Based Cooking
- Pan-Frying Basics: Cooking in a Skillet
Pan-frying—cooking food in a skillet with a moderate amount of fat—is probably the cooking technique you’ll use most often. It’s faster than oven-roasting, more controlled than grilling, and creates delicious results through the combination of conduction (hot pan), convection (hot air around food), and the flavor boost that fat provides. Yet mastering pan-frying requires understanding heat management, knowing when to flip, and developing the patience to let food brown properly.
This foundational course covers the complete pan-frying process: preheating your pan until water droplets dance on the surface, adding fat (oil, butter, or both) and letting it heat until shimmering, carefully placing food in the pan (away from you to prevent splashing), resisting the urge to move it around, and flipping only when food releases easily from the pan. You’ll learn why food sticks when the pan isn’t hot enough, why crowding the pan lowers temperature and causes steaming instead of browning, and why patience produces better crust.
We’ll discuss choosing the right fat for different temperatures: butter for moderate heat and flavor, olive oil for medium-high heat, neutral oils like vegetable or canola for high heat, and combination approaches where butter adds flavor and oil raises the smoke point. You’ll understand when to baste food with pan fat, how to recognize doneness through sound (the sizzle pattern changes), and when food needs finishing in the oven versus cooking entirely on the stovetop. This versatile technique is your gateway to countless quick, delicious meals.
- Sautéing: Quick High-Heat Cooking
Sautéing—from the French word meaning ‘to jump’—is rapid cooking over high heat in minimal fat, keeping food in constant motion. This technique is essential for quick-cooking vegetables, thin proteins, and the aromatics that form the flavor base of countless dishes. Successful sautéing requires organization (mise en place is critical), high heat, and the confidence to work quickly without panic.
This course teaches the sauté method: preheating the pan until very hot, adding oil and letting it nearly smoke, adding food in a single layer (or in batches if necessary), tossing or stirring constantly to ensure even cooking, and removing food while it’s still slightly underdone (carryover cooking will finish it). You’ll learn the classic wrist-flip technique for tossing food without utensils, when stirring with a spatula works better, and why sautéing aromatics until fragrant (30-60 seconds) builds flavor foundation.
We’ll cover common sauté applications: vegetables that need different timing (quick-cooking zucchini versus slower-cooking carrots), proteins that benefit from high heat like shrimp and sliced chicken, and the technique of sautéing garlic and onions as the start of pasta sauces, soups, and braises. You’ll understand when your pan is too hot (food burns before cooking through), too cold (food releases water and steams), and how to adjust heat quickly. Sautéing is about speed, control, and developing the confidence to cook decisively at high temperatures.
- How to Sear Meat for Maximum Flavor
Searing meat to create a dark, flavorful crust is one of cooking’s most satisfying transformations—turning pale raw meat into deeply browned, aromatic, delicious protein. This isn’t about ‘sealing in juices’ (a myth that won’t die); it’s about triggering Maillard reactions that create hundreds of new flavor compounds. Understanding how to achieve proper searing rather than gray steaming is crucial for steaks, chops, and the beginning of many braises.
This comprehensive guide covers searing fundamentals: starting with very dry meat surface (pat with paper towels—moisture is the enemy of browning), preheating your pan until smoking hot, using an oil with high smoke point, placing meat carefully in the pan and leaving it completely undisturbed until it develops deep brown crust and releases naturally. You’ll learn why the urge to peek and move meat ruins the sear, why crowding the pan drops temperature and causes steaming, and why meat that doesn’t sear properly usually reflects a temperature problem.
We’ll discuss technique details: when to flip (only once per side), how to prevent smoke from overwhelming your kitchen without sacrificing sear quality, whether to sear before or after braising (both work, with different results), and the critical step of letting seared meat rest before cutting. You’ll understand why thin steaks need ferocious heat (getting crust before the interior overcooks), while thick steaks benefit from initial searing then oven finishing. This course demystifies one of cooking’s most important techniques for creating flavor.
- Roasting Vegetables and Proteins in the Oven
Roasting uses dry oven heat to cook food, concentrating flavors through evaporation and creating caramelization that boiling or steaming can’t achieve. This hands-off method works beautifully for vegetables that become sweet and slightly charred, proteins that develop crusty exteriors while staying juicy inside, and one-pan meals that make cleanup simple. Understanding proper roasting technique—especially oil amounts and spacing—separates excellent roasted food from disappointing results.
This course explains roasting principles: preheating the oven to proper temperature (usually 400-450°F for vegetables, 300-425°F for proteins depending on size), tossing food in just enough oil to coat (too much causes soggy instead of crispy results), spreading in a single layer with space between pieces (overcrowding causes steaming), and roasting until edges brown and interior becomes tender. You’ll learn why high heat works for quick-cooking items while lower temperatures suit large roasts.
We’ll cover different roasting applications: root vegetables that caramelize beautifully, cruciferous vegetables like broccoli and cauliflower that benefit from high heat, whole chickens that need time and technique to achieve crispy skin with juicy meat, and large roasts where low-and-slow yields better results than high heat. You’ll understand when to flip food halfway through versus leaving undisturbed, how to test doneness in the center of large items, and the critical importance of resting roasted meats. This versatile method produces impressive results with minimal active cooking time.
- Broiling: Direct Heat from Above
Broiling uses your oven’s top heating element to cook food with intense radiant heat from above—essentially an upside-down grill. This method creates beautiful browning and caramelization in minutes, making it perfect for finishing dishes with a crispy top, cooking thin proteins quickly, or creating char without firing up an outdoor grill. However, broiling requires constant attention because the line between perfect and burnt is thin.
This guide covers broiling fundamentals: positioning your oven rack appropriately (usually 4-6 inches from the element, closer for quick browning, farther for cooking through without burning), preheating the broiler until glowing hot, using a broiler-safe pan (no plastic handles), and watching constantly because broiling happens fast. You’ll learn why food should be relatively dry (excess moisture prevents browning), why even thickness matters (thin edges burn before thick centers cook), and why opening the oven door occasionally to check is essential.
We’ll explore broiling applications: melting cheese perfectly on dishes like French onion soup, creating caramelized tops on casseroles, quickly cooking fish fillets, finishing a pan-seared steak, and the technique of broiling vegetables for char flavor without an outdoor grill. You’ll understand broiler quirks (hot spots where food cooks faster), when to broil on high versus low settings if your broiler has both, and how to prevent smoking out your kitchen. This often-overlooked cooking method adds a valuable tool to your repertoire when you need intense, direct heat quickly.
- Understanding Oil Temperature for Pan Cooking
Oil temperature is one of the most critical yet least understood aspects of pan cooking. Too cold, and food absorbs excess oil, releases moisture, and steams instead of browns. Too hot, and oil smokes, develops off-flavors, and can even ignite. Learning to read oil temperature through visual and auditory cues—rather than relying on thermometers—is essential for consistent pan-cooking success.
This essential course teaches you to recognize oil temperature stages: cold oil sits still; warm oil begins moving; hot oil flows easily and shimmers with movement; very hot oil emits wisps of smoke. You’ll learn that most sautéing and pan-frying happens when oil shimmers but before smoking, understand why different oils have different smoke points (refined oils tolerate higher heat than unrefined), and recognize the sound change when properly heated oil meets food (a satisfying sizzle, not silence).
We’ll discuss practical applications: testing oil temperature with small pieces of food (they should sizzle immediately), knowing when to add aromatics like garlic (after oil heats but before it smokes), understanding why food sticks when oil isn’t hot enough (proteins bind to cool metal surfaces), and how pan material affects heating speed (thin pans overheat quickly, thick pans heat slowly but steadily). You’ll learn emergency procedures if oil does start smoking excessively or catches fire (remove from heat, cover with lid, never add water). This foundational knowledge ensures every pan-cooking session starts at the right temperature.
- Deglazing and Making Simple Pan Sauces
The fond—those browned bits stuck to your pan after searing meat—represents concentrated flavor that most home cooks wash down the drain. Deglazing releases this fond into a liquid, creating the foundation for pan sauces that transform simple proteins into restaurant-quality dishes. This simple technique, taking just 2-3 minutes, is one of the highest-impact skills you can learn.
This course explains the deglazing process: after removing cooked meat from the pan, pouring off excess fat, adding liquid (wine, stock, or even water) to the still-hot pan, and scraping the bottom with a wooden spoon to release all the flavorful fond. The liquid sizzles dramatically, immediately beginning to dissolve those concentrated flavors. You’ll learn why the pan should still be hot for effective deglazing, why you shouldn’t use water unless necessary (stock or wine adds more flavor), and how to reduce the liquid by half to concentrate flavors.
We’ll cover finishing touches that transform deglazed liquid into proper sauce: reducing until slightly thickened, adding cream for richness, mounting with cold butter for silky texture, seasoning with salt and pepper, and adding fresh herbs at the end. You’ll understand timing (sauce is done when it coats the back of a spoon), how to adjust consistency (more reduction to thicken, more stock to thin), and the classic combinations like red wine for beef, white wine for chicken, and lemon for fish. This technique ensures no flavor is wasted and every pan-cooked protein comes with its own delicious sauce.
SECTION 7: Combination Cooking Methods
The Power of Multiple Techniques
- Braising: Searing Then Slow-Cooking in Liquid
Braising is the combination cooking method that produces fall-apart-tender meat from tough, inexpensive cuts. By first searing meat to develop fond, then slow-cooking it partially submerged in flavorful liquid, braising works magic on collagen-rich cuts that would be inedible if simply roasted or grilled. This technique is remarkably forgiving—hard to overcook—and creates deeply satisfying one-pot meals.
This comprehensive guide walks through the braising process: drying and seasoning meat, searing it on all sides in a heavy pot to create fond, removing meat and sautéing aromatics in the same pot, deglazing with wine or stock, returning meat and adding enough liquid to come halfway up the sides, covering tightly, and cooking at low temperature (300-325°F in the oven or low on the stovetop) for 2-4 hours until tender. You’ll learn why braising happens best in the oven (more even heat), why the pot should be covered to trap moisture, and how to test for doneness (meat should yield easily to a fork).
We’ll cover different braising applications: beef short ribs that become gelatin-rich and tender, pork shoulder that shreds easily for pulled pork, chicken thighs that stay moist in wine-based braises, and understanding that timing varies by cut size. You’ll learn how to adjust liquid levels during cooking, when to add vegetables (sturdy ones early, delicate ones near the end), and the option of uncovering for the last 30 minutes to concentrate sauce. This low-stress method transforms cheap cuts into expensive-tasting dishes through patience and proper technique.
- Making One-Pot Braises and Stews
One-pot braises and stews are the pinnacle of practical cooking—complete meals that develop in a single vessel, require minimal attention, and often taste better the next day. These dishes combine protein, vegetables, and flavorful liquid into soul-satisfying comfort food that fills your house with incredible aromas. Understanding the sequencing of ingredients and how to balance flavors makes these dishes reliable rather than hit-or-miss.
This course teaches the universal approach: beginning with browning meat in batches (don’t crowd), removing it and sautéing aromatics and sturdy vegetables, adding tomato paste or spices to bloom, deglazing to capture fond, returning meat and adding liquid, bringing to a simmer, then cooking covered at low heat. You’ll learn the critical timing question—when to add different vegetables so everything finishes tender at the same time (potatoes need an hour, peas need five minutes).
We’ll explore classic one-pot dishes: beef stew with root vegetables, coq au vin where chicken braises in red wine, lamb curry where spices build complex flavor, and understanding that the technique transfers across cuisines even as ingredients change. You’ll learn to recognize when braises need more liquid (food should be partly submerged), when they need to reduce (sauce seems thin), how to adjust seasoning at the end when flavors have concentrated, and why overnight rest allows flavors to meld. These forgiving dishes reward the cook with minimal effort for maximum satisfaction.
- Building Layered Flavors in Long-Cooked Dishes
The difference between mediocre braises and stews versus exceptional ones often comes down to layering flavors throughout the cooking process rather than adding everything at once. Each stage of cooking offers opportunities to build depth and complexity—from initial searing through aromatics, deglazing, long simmering, and final adjustments. Understanding when to add ingredients and seasonings creates dimensional flavor rather than one-note food.
This guide explains the concept of flavor layering: beginning with fond development through proper searing (Maillard reactions create hundreds of new flavor compounds), continuing with aromatics sautéed in that same fat (blooming their essential oils), adding spices early so they permeate the dish during long cooking, deglazing with wine or beer for acidity and complexity, and finishing with fresh herbs, citrus, or final seasoning adjustments that brighten the completed dish.
You’ll learn specific techniques: how browning aromatics builds deeper flavor than adding them raw, why tomato paste cooked until it darkens creates richer flavor than stirring it in at the end, when to add aromatics like bay leaves and thyme (early, to infuse) versus delicate herbs like parsley (at the very end, to preserve brightness), and the transformative effect of finishing touches like a splash of vinegar or squeeze of lemon. This course teaches you to think about flavor development as a process happening throughout cooking, not just a single seasoning moment. Apply these principles, and your long-cooked dishes develop the depth and complexity that make people ask for the recipe.
SECTION 8: Cooking Proteins
Mastering Meat, Poultry, Fish, and Eggs
- How to Cook Perfect Eggs: Scrambled, Fried, and Boiled
Eggs are the ultimate test of cooking skill—simple ingredients that reveal technique through subtle differences in texture and doneness. Yet most home cooks struggle with eggs: scrambled eggs that are rubbery or watery, fried eggs with burnt edges and runny whites, boiled eggs with green rings around the yolk. Mastering eggs builds fundamental skills that transfer to cooking more complex proteins.
This comprehensive guide covers the three basic egg preparations: scrambled eggs cooked low and slow with frequent stirring until barely set (creamy, soft curds rather than dry chunks), fried eggs with controlled heat that sets whites without overcooking yolks, and boiled eggs with precise timing that produces your desired doneness from soft to hard-boiled. For scrambled eggs, you’ll learn why low heat and patience produce superior results, when to add butter or cream, and the technique of removing from heat while still slightly wet (carryover cooking finishes them).
For fried eggs, we’ll discuss when to cover the pan to steam the top, how to baste with hot fat for over-easy results, and oil temperature that crisps edges without splattering violently. For boiled eggs, you’ll learn the cold-start versus boiling-water methods, exact timing for different doneness levels, and the shocking technique that makes peeling easy. This course also covers soft-boiled eggs with runny yolks and poached eggs with technique for keeping whites contained. Master these three preparations, and you’ve mastered protein cooking fundamentals applicable to countless dishes.
- Cooking Chicken Breasts and Thighs
Chicken is America’s most-consumed protein, yet dry, overcooked chicken breast is one of the most common kitchen disappointments. The challenge is that breast meat needs gentle handling to prevent drying, while dark meat (thighs and legs) can tolerate higher heat and longer cooking. Understanding these different requirements and choosing appropriate cooking methods for each transforms chicken from boring to delicious.
This course covers chicken breast techniques: pounding to even thickness so edges don’t overcook before the center is done, brining in salt water for 30 minutes to increase moisture retention, cooking with moderate heat rather than aggressive searing, and always using a thermometer to remove at 160°F (carryover cooking brings it to 165°F). You’ll learn why resting is critical for juicy chicken, why bone-in breasts stay moister than boneless, and cooking methods that work best (pan-roasting, gentle poaching, or braising rather than grilling or high-heat roasting).
For chicken thighs, we’ll discuss their advantages: more forgiving than breasts, harder to overcook due to fat content, better flavor from dark meat, and versatility in cooking methods. You’ll learn when to use boneless skinless thighs (braises, stir-fries) versus bone-in skin-on (roasting, grilling), how to render skin properly for crispy texture, and why thighs tolerate higher temperatures and longer cooking than breasts. This course ensures you’ll never serve dry chicken again and understand how to adapt cooking methods to different cuts.
- How to Cook Ground Meat Properly
Ground meat—beef, pork, turkey, lamb—is versatile, affordable, and quick-cooking, but many home cooks struggle with properly browning it rather than steaming it into gray mush. The key issues are heat control, avoiding overcrowding, and breaking it up at the right moment versus leaving it undisturbed. Proper ground meat technique applies whether you’re making burgers, taco filling, pasta sauce, or meatballs.
This guide covers the fundamental approach for loose ground meat (like taco filling or meat sauce): heating the pan until very hot, adding meat without overcrowding, pressing it into the pan in a single layer, leaving it completely undisturbed for 2-3 minutes until the bottom browns, then breaking it up and stirring occasionally until cooked through. You’ll learn why this method creates actual browning and develops flavor through Maillard reactions, while the common approach of immediately breaking up and stirring produces pale, steamed meat with no caramelization.
For burgers and meatballs, we’ll discuss different techniques: forming gentle patties or balls without overworking (overworked meat becomes dense and tough), creating a dimple in burger centers to prevent puffing, knowing when to flip (only once for burgers), and understanding that a little pink in the center is acceptable for whole-muscle ground meat but not for mechanically tenderized or mixed products. You’ll learn proper seasoning timing, fat percentage considerations (80/20 for flavor, 90/10 for leaner options), and resting after cooking. This course ensures your ground meat develops proper flavor and texture every time.
- Basic Steak Cooking Techniques
A perfectly cooked steak—seared crust outside, juicy and properly done inside—is one of cooking’s great achievements and one that eludes many home cooks. The challenges are managing high heat, knowing when to flip, determining doneness without cutting into the meat, and accounting for carryover cooking. Master these elements, and expensive steakhouse results become achievable at home.
This comprehensive course covers the complete steak-cooking process: starting with room-temperature meat (cold meat cooks unevenly), patting completely dry (moisture prevents searing), seasoning generously with salt and pepper, preheating your pan until smoking hot, adding high-smoke-point oil, placing steak in pan and leaving undisturbed for 3-5 minutes until a dark crust forms and meat releases naturally. You’ll learn to flip only once, finish thick steaks in a 400°F oven for even cooking, and remove steak 5°F below target temperature to account for carryover.
We’ll cover the touch method for testing doneness (comparing meat firmness to parts of your hand), why an instant-read thermometer provides the most reliable results, target temperatures for different doneness levels (120°F for rare through 140°F for medium-well), and the critical importance of resting 5-10 minutes before slicing. You’ll understand why butter-basting in the final minute adds flavor, when to use cast iron versus stainless steel pans, and why reverse-searing (low oven then high-heat sear) works brilliantly for thick cuts. This course demystifies steak cooking and builds confidence with expensive proteins.
- Simple Fish Cooking Methods
Fish is one of the healthiest proteins but also one of the most intimidating for home cooks. Delicate flesh that falls apart, sticking to pans, overcooking in seconds, and strong fishy odors when mishandled all contribute to fish-cooking anxiety. Yet fish is actually easier and faster to cook than most proteins when you understand its unique characteristics and match cooking method to the specific fish.
This course teaches fundamental fish-cooking principles: recognizing that fish is delicate and requires gentler handling than meat, understanding that fish continues cooking rapidly after removal from heat (remove it slightly underdone), knowing that fish is done when it just begins to flake and turns opaque, and choosing cooking methods that support rather than fight these characteristics. You’ll learn the best techniques for different fish types: pan-searing for firm fish like salmon and tuna, poaching or steaming for delicate white fish, and baking or broiling for forgiving hands-off cooking.
We’ll cover detailed techniques: preventing sticking by ensuring your pan is properly preheated and fish is dry, knowing when to flip (when fish releases naturally after developing crust), using a fish spatula designed for delicate proteins, and the option of cooking skin-on (skin protects flesh) versus skinless. You’ll understand doneness temperatures for different fish (125°F for salmon, 130-135°F for white fish), timing based on thickness (the 10-minute per inch rule as a starting point), and how to tell if fish is fresh before cooking. This course removes the mystery from fish cooking, making this healthy protein approachable.
- Cooking Pork Chops and Tenderloin Safely
Pork used to require cooking to 160°F-170°F to kill parasites, resulting in a generation of cooks who believe pork must be cooked until gray and dry. Modern pork is much safer, and USDA guidelines now recommend 145°F followed by a 3-minute rest—a temperature that yields juicy, slightly pink pork rather than sawdust. Understanding safe cooking temperatures and techniques for lean pork cuts transforms this affordable protein from disappointing to delicious.
This guide covers the two main lean pork cuts: chops (essentially pork steaks) and tenderloin (a long, narrow roast). For pork chops, you’ll learn techniques similar to cooking steaks: bringing to room temperature, patting dry, seasoning generously, searing over high heat to develop crust, and finishing in the oven if thick. The crucial difference is target temperature—145°F at the thickest part, which produces juicy chops with a hint of pink rather than the dried-out gray pork many people associate with this cut.
For pork tenderloin, we’ll discuss the advantage of this cut (extremely lean and tender but also prone to drying), best cooking methods (quick searing followed by roasting, or reverse-searing), and the importance of removing at 140°F to account for carryover. You’ll learn why brining lean pork cuts improves moisture retention, when to pound chops to even thickness, and the technique of letting pork rest 3-5 minutes before slicing. This course updates your understanding of pork safety and teaches techniques that produce the juicy results this lean protein deserves.
SECTION 9: Cooking Vegetables, Grains, and Starches
Plant-Based Foundations
- How to Cook Any Vegetable: Method Guide
Every vegetable has optimal cooking methods based on its density, water content, sugar content, and structure. Dense root vegetables benefit from roasting that caramelizes their natural sugars. Delicate greens need quick cooking to preserve color and nutrients. Knowing which method to choose for different vegetables—and understanding why—eliminates the guesswork and produces consistently excellent results.
This comprehensive guide provides a decision framework: tender vegetables with high water content (zucchini, tomatoes, leafy greens) need brief cooking over high heat or gentle steaming. Sturdy vegetables with moderate water content (broccoli, green beans, asparagus) benefit from blanching, steaming, or quick roasting. Dense vegetables with low water content (potatoes, carrots, beets, winter squash) need longer cooking through roasting, boiling, or steaming. Cruciferous vegetables (broccoli, cauliflower, Brussels sprouts) develop sweetness through high-heat roasting.
You’ll learn specific techniques for common vegetables: how to prevent zucchini from releasing too much water, why Brussels sprouts roast better when halved, how to get crispy exterior on roasted potatoes, why shocking green vegetables preserves color, and when to peel versus leave skin on. We’ll discuss seasoning timing (before cooking for roasted vegetables, after for steamed ones), testing for doneness (tender but not mushy for most applications), and how cooking method affects nutritional retention. This course serves as your vegetable-cooking reference, ensuring you can handle any vegetable confidently.
- Cooking Perfect Rice Every Time
Rice is a staple for billions of people, yet many American home cooks struggle to cook it consistently well—producing mushy, sticky, burnt, or undercooked results. The key factors are the proper ratio of water to rice (which varies by rice type), bringing water to the right temperature before covering, and leaving the rice completely undisturbed during cooking. Master these elements, and perfect rice becomes reliable.
This course covers different rice types and their requirements: long-grain white rice (jasmine, basmati) using a 1.5:1 water-to-rice ratio, short-grain white rice (sushi rice) using a 1.25:1 ratio, and brown rice requiring more water (2.5:1) and longer cooking time due to the bran layer. You’ll learn the absorption method that most home cooks use: rinsing rice to remove excess starch, bringing water and rice to a boil, reducing to the lowest heat, covering tightly, and cooking undisturbed for the specified time (usually 15-20 minutes for white rice, 40-45 for brown).
We’ll discuss common mistakes and solutions: lifting the lid to check (releases steam and disrupts cooking), stirring during cooking (breaks grains and releases starch, creating mushiness), not letting rice rest covered after cooking (final 10 minutes off heat allows steam to finish the job), and understanding that slightly underdone rice will finish from residual heat. You’ll learn to identify perfect rice (grains separate easily, tender but with slight chew), troubleshoot problems, and the technique of fluffing with a fork before serving. This staple skill makes rice a reliable side dish rather than a source of anxiety.
- How to Cook Dried Beans and Legumes
Dried beans are nutritious, economical, and infinitely versatile, but many home cooks avoid them due to long cooking times, digestive concerns, and uncertainty about when beans are properly cooked. Understanding the basics—soaking to reduce cooking time, seasoning timing, and doneness indicators—makes beans approachable and adds a valuable protein source to your cooking repertoire.
This guide explains the complete bean-cooking process: sorting and rinsing dried beans to remove debris, soaking overnight in cold water to rehydrate and reduce cooking time (or using the quick-soak method of boiling for 2 minutes then soaking for an hour), draining and rinsing soaking water, covering with fresh water, bringing to a simmer, and cooking gently until tender (1-2 hours depending on bean type and age). You’ll learn why adding salt early doesn’t actually prevent beans from softening (this myth persists despite being disproven), and why adding acidic ingredients like tomatoes should wait until beans are tender (acid does slow softening).
We’ll cover different legume types and their cooking times: quick-cooking lentils (20-30 minutes, no soaking needed), standard beans like pintos and black beans (1.5-2 hours after soaking), and slow-cooking chickpeas (2-3 hours after soaking). You’ll learn to test doneness by tasting (beans should be completely tender with no chalkiness), understand that older beans take longer to cook, and discover that well-cooked beans in flavorful liquid are the foundation for countless satisfying meals. This course makes cooking dried beans from scratch practical and reliable.
- Potato Cooking Methods: Boiled, Roasted, Mashed
Potatoes are one of the world’s most versatile vegetables, transforming dramatically based on cooking method: boiled potatoes for tender salads, roasted potatoes for crispy-outside/creamy-inside perfection, and mashed potatoes for smooth comfort food. Understanding how potato starch behaves with different cooking methods and choosing the right potato variety for each application makes the difference between excellent and mediocre results.
This comprehensive course covers the three fundamental potato preparations: boiled potatoes start in cold water (hot water cooks exteriors before interiors soften), salt the water generously, bring to a simmer, and cook until tender throughout (testing with a knife or fork). You’ll learn why starting in cold water prevents blown-out exteriors, when to drain and cool versus using hot for mashing, and the advantage of leaving skins on for potato salad.
For roasted potatoes, we’ll discuss the technique that creates the ultimate crispy exterior: parboiling first to rough up the surface (creating more area for crisping), tossing in fat, and roasting at high heat (425-450°F) until deeply golden. For mashed potatoes, you’ll learn why russet potatoes create the fluffiest texture, how to prevent gumminess (don’t over-mix once liquid is added), the technique of ricing or mashing while still hot, and when to add butter and warm milk. Understanding these fundamental potato preparations gives you the foundation for countless dishes from this remarkably versatile vegetable.
- Cooking Fresh and Frozen Vegetables
The eternal question: are fresh vegetables always better than frozen? The surprising answer is that frozen vegetables, frozen at peak ripeness, often have better nutrition and consistency than ‘fresh’ vegetables that spent a week in transport and storage. Understanding when to choose fresh, when frozen is superior, and how to cook each for best results ensures you’re using vegetables optimally year-round.
This guide explores the advantages of each: fresh vegetables offer superior texture for raw applications (salads, crudités), better control over cooking level, and peak flavor during their natural season. Frozen vegetables offer year-round consistency, vegetables frozen at peak ripeness (often more nutritious than off-season ‘fresh’), no prep work, and excellent value. You’ll learn which vegetables freeze well (corn, peas, green beans, spinach) and which don’t (high-water content vegetables like cucumbers and lettuce).
For cooking frozen vegetables, we’ll discuss the cardinal rule: don’t thaw first—cook from frozen to prevent mushiness. You’ll learn that frozen vegetables often cook faster than fresh (blanching before freezing partially cooks them), that they release water during cooking (account for this in dishes), and techniques for each method (steaming, sautéing, roasting). For fresh vegetables, we’ll cover proper storage to maintain quality, washing techniques, and determining which seasons provide the best quality for different vegetables. This course removes judgment from the fresh-versus-frozen debate and teaches you to use both strategically.
- Simple Vegetable Side Dishes
Vegetable side dishes don’t need to be complicated—often, the simplest preparations showcase vegetables best. Yet many home cooks struggle to move beyond steamed broccoli or bagged salad, missing opportunities to add color, nutrition, and variety to meals. Learning a handful of versatile techniques that work across many vegetables makes it easy to include satisfying vegetable sides with every meal.
This practical course provides templates rather than specific recipes: the basic sauté (hot pan, oil, vegetables, season, cook until tender-crisp, finish with lemon or herbs), the basic roast (toss with oil and salt, spread on sheet pan, roast at 425°F until caramelized), the basic steam (boiling water, steamer basket, vegetables, cover, steam until tender, dress with butter and seasoning), and the basic blanch-and-shock (boiling salted water, vegetables 2-3 minutes, ice bath, reheat in butter when serving). You’ll learn that these templates work for dozens of different vegetables.
We’ll discuss flavor additions that elevate simple preparations: garlic and shallots sautéed before adding vegetables, fresh herbs added at the end for brightness, lemon juice or vinegar for acidity, toasted nuts for texture, and cheese for richness. You’ll understand how to adjust timing for different vegetables (quick-cooking zucchini versus slower-cooking carrots), recognize proper doneness (tender but not mushy for most), and develop your own variations. This course makes vegetable sides easy enough to include regularly, moving them from afterthought to integral part of every meal.
SECTION 10: Mastering Cooking Techniques
Advanced Skills and Problem-Solving
- How to Season and Taste While Cooking
The most critical skill in cooking isn’t knife work or heat control—it’s developing your palate through tasting and adjusting seasoning throughout the cooking process. Professional cooks taste constantly, making tiny adjustments that accumulate into balanced, delicious food. Yet many home cooks season once at the beginning and hope for the best, or worse, don’t taste until serving, discovering too late that food is under-seasoned.
This essential course teaches the practice of progressive tasting: tasting early in cooking to assess your baseline, tasting midway to see how flavors are developing, and tasting near the end when you can still make adjustments. You’ll learn what to look for—is food under-seasoned (flat, dull flavor), over-seasoned (too salty or assertive), or lacking balance (needs acid to brighten, or fat to round out sharp flavors). The critical insight is that food should taste slightly under-seasoned during cooking because flavors concentrate as water evaporates and ingredients break down.
We’ll cover the elements of balanced seasoning beyond just salt: acid (lemon juice, vinegar) that brightens and balances richness, fat (butter, cream, oil) that carries flavors and creates smooth texture, sweetness (sugar, honey) that rounds harsh edges, and spice or heat that adds complexity. You’ll learn to identify what’s missing rather than just adding more salt, understand that cold food needs more seasoning than hot food (taste at serving temperature), and develop confidence in your palate through practice. This course transforms cooking from following recipes to actively creating and adjusting flavor.
- Combining Multiple Cooking Methods in One Dish
The most impressive dishes often use multiple cooking methods in sequence, each contributing different qualities: searing creates crust and fond, braising tenderizes tough proteins, reduction concentrates sauce, and final high heat adds crispy finishing touches. Understanding how to combine techniques strategically—rather than relying on a single method—dramatically expands your cooking capabilities and produces restaurant-quality results at home.
This advanced course explores common technique combinations: sear-then-braise for tough meat cuts (searing develops fond and color, braising tenderizes), blanch-then-sauté for vegetables (blanching sets color and partially cooks, quick sauté finishes with browning), roast-then-broil for crispy tops (roasting cooks through, broiling creates final crust), and poach-then-sear for delicate proteins (poaching cooks gently, final sear adds texture contrast). You’ll learn why these combinations produce better results than single-method cooking.
We’ll discuss practical applications: braised short ribs finished under the broiler for caramelized glaze, chicken thighs pan-seared then finished in the oven for crispy skin and juicy interior, vegetables blanched ahead then quickly sautéed for dinner parties, and steaks reverse-seared (slow oven roast then high-heat sear) for perfect crust and even interior. You’ll understand how to sequence techniques logically, manage timing when multiple methods are involved, and recognize when combining methods adds value versus just adding steps. This course pushes your cooking beyond basic techniques into the strategic thinking that creates exceptional dishes.
- Understanding Herbs and Spices in Cooking
Herbs and spices are the difference between bland, one-dimensional food and complex, layered flavors that keep people coming back for another bite. Yet many home cooks use them tentatively or incorrectly, not understanding when to add them, which forms work best (fresh versus dried), and how to combine them for balanced rather than chaotic results. Learning to use seasonings confidently is one of the highest-impact skills you can develop.
This comprehensive guide explains fundamental concepts: the difference between herbs (leaves of plants, typically milder) and spices (seeds, bark, roots, typically more intense), understanding that dried herbs are more concentrated than fresh (use 1/3 the amount), and knowing that spices release their flavors when toasted or bloomed in fat. You’ll learn timing: hardy herbs like rosemary and thyme can withstand long cooking and should be added early, while delicate herbs like basil and parsley should be added at the end to preserve their brightness. Spices benefit from toasting or cooking in fat to release their essential oils.
We’ll cover classic combinations that work across cuisines: Italian (garlic, basil, oregano, parsley), French (thyme, bay leaf, tarragon), Mexican (cumin, coriander, oregano), Indian (cumin, coriander, turmeric, garam masala), and understanding why these pairings evolved. You’ll learn to build your spice collection strategically, recognize when spices are too old (aroma fades after 6-12 months for ground spices), and develop the confidence to season decisively rather than timidly. This course opens up flavor possibilities that transform your cooking from adequate to exceptional.
- Troubleshooting Common Cooking Mistakes
Even experienced cooks make mistakes, but the difference between beginners and confident cooks is knowing how to recognize and fix problems as they happen. Food slightly over-salted can be balanced with acid. Sauce too thin can be reduced or thickened. Meat approaching overcooked can be removed from heat immediately. Understanding common problems and their solutions means mistakes become learning opportunities rather than disasters.
This essential course covers frequent cooking problems and their fixes: over-salted food (dilute with unsalted liquid, add acid for balance, bulk up the dish with more ingredients, use for highly seasoned preparations rather than standalone), bland food (more salt, add acid for brightness, add fat for richness, finish with fresh herbs), burnt fond in the pan (scrape up what isn’t black, deglaze carefully, strain sauce if needed), overcooked pasta or vegetables (shock in ice water to stop cooking, undercook slightly next time accounting for carryover), and tough meat (continue cooking if collagen-rich cuts that need more time, or slice thin against the grain to minimize toughness).
We’ll address other common issues: food sticking to the pan (pan wasn’t hot enough, food wasn’t dry, or you tried to flip too early), sauce too thin (reduce by simmering uncovered, or thicken with starch slurry), sauce too thick (thin with stock or water), food burning while interior stays raw (lower heat and give more time, or finish in gentler oven heat), and proteins that won’t brown (surface was wet, pan too crowded, or temperature too low). This course teaches the problem-solving mindset that transforms cooking from anxiety-inducing to confident, developing your ability to assess situations and make real-time adjustments.
Your Path to Cooking Mastery
These 58 courses represent your complete culinary education from absolute beginner to confident, competent home cook. Unlike recipe collections that teach you to make specific dishes, this comprehensive guide teaches you how to think about cooking—understanding the principles, recognizing the patterns, developing the judgment that allows you to cook anything. Work through these courses systematically, and you’ll build skills that compound. Each course reinforces the previous ones, creating a web of knowledge that transforms separate techniques into integrated competence. You won’t just know how to sear a steak—you’ll understand why it works, how to adapt the technique to different proteins, what to do when things go wrong, and how this technique fits into hundreds of different dishes. This is the Chefts promise: master the fundamentals, understand the reasoning, develop the judgment. The recipes will follow naturally. Welcome to your cooking education.