What You Actually Need to Cook Confidently
Learning Objectives
By the end of this course, you will be able to:
- Apply the three criteria for essential tools—necessity, versatility, and frequency—to evaluate any kitchen equipment purchase
- Identify quality markers in knives (full tang construction, balanced weight, quality steel) and cookware (heavy bottom construction, appropriate materials, secure handles)
- Select the three essential knives every cook needs: chef’s knife (8–10 inch), paring knife (3–4 inch), and serrated bread knife
- Choose appropriate cutting board size (minimum 12×18 inches) and material (wood for knife care, plastic for raw proteins)
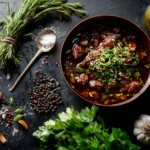
- Understand essential cookware: stainless steel skillet for browning, nonstick for delicate foods, saucepan, stockpot, and Dutch oven
- Distinguish between dry and liquid measuring cups and understand why they are not interchangeable
- Recognize the importance of an instant-read thermometer as the only reliable method for determining protein doneness
- Resist unnecessary gadget purchases by understanding what tools you don’t need yet
Skill Ontology Classification
| Ontology Category | Classification |
| Skill Type | Kitchen Foundations > Equipment Knowledge > Tool Selection and Evaluation |
| Technique Categories | Tool Evaluation (necessity, versatility, frequency criteria), Quality Assessment (construction markers, material properties), Knife Selection (blade types, sizes, maintenance), Cookware Selection (materials, heat properties, applications), Measurement Tools (dry vs. liquid, weight vs. volume) |
| Quality Outputs | Properly equipped kitchen without unnecessary clutter, appropriate tools for every basic cooking task, quality investments in high-use items, budget-conscious choices for secondary tools |
| Cooking Interactions | Enables all knife skills courses (proper knife enables proper technique), supports all cooking technique courses (appropriate cookware enables proper heat management), integrates with measuring course (accurate tools enable recipe success) |
| Prerequisite Skills | Course 1 (Kitchen Safety—understanding safe knife handling and temperature measurement needs) |
| Unlocks Skills | Course 3 (Kitchen Workspace Setup), course 4 (Stove and Oven Controls), All knife skills courses (6–10), course 14 (Measuring Ingredients), All cooking technique courses |
Essential Kitchen Equipment Terminology
| Term | Definition |
| Full Tang | Knife construction where the blade metal extends through the entire length of the handle, providing superior balance, durability, and control; visible as a strip of metal between handle scales; the hallmark of quality knife construction |
| Honing Steel | A rod (steel or ceramic) used to realign a knife’s edge between sharpenings; does not remove metal or create a new edge but straightens microscopic bends that develop during cutting; professional cooks hone before each use |
| Heavy Bottom Construction | Cookware design featuring thick metal at the base of the pan, distributing heat evenly across the cooking surface and preventing hot spots; essential for proper browning and temperature control; the most important quality marker in pans |
| Fond | The browned bits that develop on the bottom of a pan during searing or sautéing; created through Maillard reactions; the flavor foundation for pan sauces; only develops properly in stainless steel or cast iron (not nonstick) |
| Dutch Oven | A heavy, lidded pot (typically enameled cast iron) designed for braising, stewing, and oven-to-stovetop cooking; exceptional heat retention enables slow cooking techniques; versatile enough for bread baking, deep frying, and one-pot meals |
| Tare Function | A kitchen scale feature that zeros out the weight of a container, allowing you to measure only the ingredient being added; essential for sequential measuring where multiple ingredients are added to the same bowl |
| Instant-Read Thermometer | A probe thermometer displaying food temperature within seconds (ideally 2–3 seconds); the only reliable method for determining protein doneness; eliminates guesswork and ensures both food safety and optimal texture |
Welcome to your second foundational course in the Chefts culinary education system. At Chefts, we teach you to think like a chef—and professional chefs know that the right tools don’t just make cooking easier; they make proper technique possible. This course cuts through marketing noise to identify the truly essential tools that form the backbone of every functional kitchen.
Walk into any cooking store and you’ll be overwhelmed by gadgets, each promising to revolutionize your cooking. Spiralizers, avocado slicers, egg separators, garlic presses, specialized pan scrapers, single-purpose tools that clutter your drawers and drain your wallet. The truth? You need far less than they want to sell you. Professional kitchens operate with a surprisingly limited tool set—not because chefs are minimalists, but because they understand that a few quality, versatile tools outperform dozens of mediocre, specialized ones.
This comprehensive guide identifies the absolute essentials—the tools without which cooking becomes frustrating or impossible—and explains exactly why each one matters. More importantly, it teaches you how to evaluate quality, understand materials, and make intelligent purchasing decisions that align with your budget and cooking ambitions.
Throughout the Chefts curriculum, we’ll reference these tools constantly. Our upcoming course on knife holding and handling teaches you how to use the chef’s knife you’ll acquire here. When we cover heat control and cooking methods, you’ll understand why the heavy-bottomed skillet we recommend distributes heat so effectively. Every technique we teach assumes you have the right equipment—not the most expensive, but the appropriate tools for the task.
Part 1: The Professional’s Approach to Kitchen Tools
Quality Over Quantity, Versatility Over Specialization
Before discussing specific tools, understand the philosophy that guides professional kitchens: invest in versatile, quality basics rather than accumulating specialized gadgets. A quality chef’s knife handles 90% of cutting tasks. A good skillet cooks everything from eggs to steaks. A sturdy cutting board provides a stable work surface for countless preparations. These fundamental tools, properly chosen, serve you for decades.
The Three Criteria for Essential Tools
Essential Tool: A piece of equipment that is genuinely necessary for basic cooking, cannot be reasonably substituted with something else, and is used frequently enough to justify its space and cost. By this definition, a chef’s knife is essential (you literally cannot cook without cutting food), while a garlic press is not (you can mince garlic with a knife).
Criterion 1: Necessity. Does this tool enable tasks that are otherwise impossible or extremely difficult? A colander drains pasta efficiently—you can’t reasonably pour boiling water and pasta directly into the sink. A cherry pitter removes pits faster—but you can use a knife, making it convenient rather than essential.
Criterion 2: Versatility. Can this tool handle multiple tasks? A chef’s knife chops, slices, dices, and minces. A 12-inch skillet sears steaks, sautés vegetables, fries eggs, and makes pan sauces. Versatile tools earn their space. Single-purpose gadgets rarely do.
Criterion 3: Frequency. Will you use this tool regularly? A pot is used multiple times per week. A fondue set might be used twice per year. Frequency of use determines whether a tool is essential or optional.
Understanding Quality Markers
Quality doesn’t always mean expensive, but it does mean specific construction characteristics that affect performance and longevity. Learning to identify quality helps you make smart purchases at any price point.
For knives: Full tang construction (blade metal extends through the entire handle), comfortable handle that fits your grip, balanced weight distribution, and quality steel that holds an edge. High-carbon stainless steel offers the best balance of edge retention and rust resistance for home cooks.
For cookware: Heavy bottom construction (distributes heat evenly), appropriate material for the task (stainless steel for browning, nonstick for delicate foods), comfortable heat-resistant handles, and flat bottom that sits flush on your burner. Avoid thin, lightweight pans that develop hot spots and warp over time.
For cutting boards: Sufficient size (at least 12×18 inches for primary board), adequate thickness (won’t warp or flex), material that’s gentle on knife edges (wood or plastic), and weight that provides stability.
General construction: Solid, substantial feel (quality tools have heft), smooth surfaces without sharp edges or rough spots, secure connections (handles don’t wobble, lids fit properly), and materials appropriate to purpose.
Part 1 Summary: Professional kitchens prioritize versatile, quality basics over specialized gadgets. Evaluate tools using three criteria: necessity (enables otherwise impossible tasks), versatility (handles multiple functions), and frequency (used regularly). Quality markers include full tang knife construction, heavy bottom cookware, and adequate cutting board size. These principles guide intelligent purchasing at any budget level.
Part 2: Knives—Your Most Important Tools
The Three Knives Every Cook Needs
Knives are the most personal tools in your kitchen and the ones worth investing in properly. A quality knife, properly maintained, serves you for decades. These three knives handle virtually every cutting task you’ll encounter in home cooking.
The Chef’s Knife (8–10 inches): Your Workhorse
Chef’s Knife: A large, multipurpose knife with a blade typically 8–10 inches long, featuring a curved edge that allows a rocking motion when cutting. This is your primary knife, handling 90% of kitchen cutting tasks from chopping onions to slicing chicken to mincing herbs.
Most home cooks find an 8-inch blade more maneuverable, while taller cooks or those with large hands prefer the 10-inch. Visit a store and hold both—the right knife feels balanced, with weight distributed evenly between blade and handle. Look for full tang construction, comfortable grip, and a blade with appropriate flex (some flex is normal, not a defect).
Budget guidance: Quality options exist at every price point—Victorinox Fibrox ($30–50), Wüsthof Pro or MAC Professional ($100–150), or premium choices like Shun ($200+). The expensive knife isn’t three times better; it’s incrementally better with nicer materials. A $40 Victorinox in skilled hands outperforms a $200 knife used improperly.
The Paring Knife (3–4 inches): Precision Work
Paring Knife: A small knife with a 3–4 inch blade designed for detailed cutting work such as peeling, trimming, and intricate cuts. While your chef’s knife handles large-scale cutting on a cutting board, your paring knife handles precision tasks, often performed while holding food in your hand.
Essential uses include peeling apples and potatoes, removing stems from strawberries, deveining shrimp, trimming fat from meat, and making precise garnishes. Look for a comfortable handle, a blade that tapers to a sharp point, and moderate flexibility for following curves. Unlike the chef’s knife where you want substantial weight, a paring knife should feel light and maneuverable.
Budget guidance: A $10–15 paring knife from Victorinox or Mercer performs admirably. Unlike chef’s knives where you’re investing in a lifetime tool, paring knives are somewhat disposable—when they become dull after 3–5 years of regular use, many cooks simply replace them.
The Serrated Bread Knife (8–10 inches): For Crusty Exteriors
Serrated Knife: A knife with a scalloped, tooth-like edge designed to saw through foods with tough exteriors and soft interiors without crushing them. The serrated edge grips and cuts rather than pressing and tearing.
Essential uses include slicing crusty bread without tearing, cutting tomatoes without squashing them, slicing delicate layer cakes, and cutting citrus fruits. The serrations prevent slipping on smooth surfaces like tomato skin. A chef’s knife, no matter how sharp, crushes soft tomatoes and tears bread—the serrated knife solves these problems.
Budget guidance: A $15–25 knife from Victorinox, Mercer, or Dexter-Russell serves well. Serrated knives are difficult to sharpen at home, so many cooks treat them as semi-disposable, replacing them after 5–10 years.
The Honing Steel: Essential Maintenance
Honing Steel: A rod (typically steel or ceramic) used to realign a knife’s edge between sharpenings. This is not a sharpener—it doesn’t remove metal or create a new edge. Instead, it straightens microscopic bends in the existing edge, maintaining cutting performance. Professional cooks hone their knives before each use.
Even a quality chef’s knife will feel dull after a few uses as the edge bends microscopically during cutting. A quick pass over the honing steel (10–15 seconds) restores cutting performance immediately. This extends the time between professional sharpenings from weeks to months. Look for a steel at least 10 inches long (longer than your knife blade), comfortable handle, and either smooth steel or fine ceramic. Budget: $15–30, lasts decades.
Part 2 Summary: Three knives handle virtually all cutting tasks: chef’s knife (8–10 inch, your primary tool), paring knife (3–4 inch, for precision work), and serrated bread knife (8–10 inch, for crusty/soft foods). Invest most in your chef’s knife. A honing steel maintains edge alignment between professional sharpenings. Quality exists at every price point—technique matters more than expense.
Part 3: Cutting Boards and Work Surfaces
The Foundation of Safe, Efficient Knife Work
Cutting Board: A flat surface designed specifically for cutting food, providing stability for safe knife work while protecting both your knife edge and your countertop. The right cutting board prevents injuries (by staying stable), preserves your knives (by not dulling them), and provides adequate workspace for food preparation.
Size Matters: Go Bigger Than You Think
The most common mistake home cooks make is buying cutting boards that are too small. A cramped cutting board is frustrating and dangerous—ingredients fall off the edges, you can’t make full knife strokes, and you’re constantly stopping to move things around. Professional kitchens use cutting boards that seem absurdly large to home cooks, but there’s a reason: space enables technique.
Minimum recommended size: 12 inches wide by 18 inches long for your primary cutting board. This provides adequate space to position food safely, make full cutting strokes, and pile cut ingredients to the side without crowding. Smaller boards (8×10 or 10×14) work as secondary boards for small tasks.
Thickness and stability: Look for boards at least 3/4 inch thick. Thinner boards flex when you cut, reducing control and potentially causing the board to warp. Heavier boards stay put better. If a board is light enough to shift when you press down while cutting, it’s too light.
Material Selection: Wood Versus Plastic
Wood cutting boards (maple, walnut, cherry, teak): Natural antibacterial properties, gentler on knife edges, attractive appearance, develops character over time. Requires regular oiling (every few weeks with food-grade mineral oil), cannot go in dishwasher, typically more expensive. Edge grain boards are standard; end grain boards are premium options exceptionally gentle on knives.
Plastic cutting boards (polyethylene, polypropylene): Dishwasher safe (high heat sanitization), inexpensive (easy to own multiple boards), available in various colors (helps prevent cross-contamination—red for meat, green for vegetables), lightweight. Harder on knife edges, develops cut grooves over time where bacteria can hide, less attractive.
The best solution: Own both. Use a large wood board as your primary board for most cutting tasks and maintain it properly. Keep color-coded plastic boards for raw meat, poultry, and seafood, replacing them when they become heavily grooved. This approach balances knife care, sanitation, and practicality.
Part 3 Summary: Cutting boards should be larger than you think (minimum 12×18 inches) and thick enough to stay stable (3/4 inch minimum). Wood boards are gentler on knives but require maintenance; plastic boards are dishwasher-safe and good for raw proteins. The ideal setup includes both: wood for primary cutting, color-coded plastic for raw meat safety.
Part 4: Essential Cookware—Pots and Pans
The Four Pieces That Handle Everything
Cookware is where many home cooks waste money buying complete sets full of pieces they’ll never use. Professional kitchens operate with a core set of versatile pans, not thirty pieces of matching cookware. These four essential pieces handle virtually every cooking task.
The 10–12 Inch Skillet: Your Primary Pan
Skillet (also called Fry Pan): A flat-bottomed pan with relatively low, slanted sides designed for sautéing, pan-frying, and browning. The wide, open surface area allows moisture to evaporate quickly, enabling proper browning rather than steaming. This is your most-used pan, handling everything from morning eggs to evening steaks.
A 10–12 inch skillet is the sweet spot—large enough to sear two steaks or sauté vegetables for four people without crowding, yet not so enormous it won’t fit on your burner.
Material options: Stainless steel (excellent for browning, develops fond for pan sauces, lasts forever, oven-safe to high temperatures), cast iron (exceptional heat retention, naturally nonstick when seasoned, heavy, requires maintenance), or nonstick (convenient for eggs and delicate fish, cannot handle high heat, coating degrades requiring replacement every 2–3 years).
Investment recommendation: Own both a stainless steel skillet (for searing and high-heat tasks) and a nonstick skillet (for eggs and delicate items). Expect $50–100 for quality stainless steel, $20–40 for nonstick.
The 3–4 Quart Saucepan: Everyday Versatility
Saucepan: A round pot with relatively high, straight sides and a long handle, designed for cooking sauces, grains, small batches of soup, and reheating. The high sides reduce evaporation and splashing while the long handle provides safe lifting.
A 3–4 quart capacity handles most tasks: cooking rice for four, making pasta sauce, heating soup, boiling eggs. Smaller saucepans (1–2 quart) are useful additions for warming butter or making small amounts of sauce. Look for heavy bottom construction, comfortable handle that stays cool, and a tight-fitting lid. Expect $40–80 for quality stainless steel with aluminum core.
The 8-Quart Stockpot: Large-Batch Cooking
Stockpot: A tall, large-capacity pot designed for making stock, cooking pasta, and preparing large batches of soup or chili. The tall, narrow shape minimizes evaporation during long simmering while the large capacity handles volume.
An 8-quart stockpot handles most home cooking needs: boiling pasta with adequate water, making stock from a chicken carcass, preparing soup for a crowd. Quality matters less here than with skillets—a $30–60 stainless steel stockpot performs nearly identically to premium options. Look for sturdy handles (you’ll be lifting it full of liquid) and a lid.
The Dutch Oven: Braising and Beyond
Dutch Oven: A heavy, lidded pot (typically enameled cast iron) designed for braising, stewing, and oven-to-stovetop cooking. The heavy construction retains heat exceptionally well, maintaining consistent low temperatures ideal for converting tough collagen to tender gelatin during long braises.
Essential uses include braising tough cuts of meat until fall-apart tender, making one-pot meals like chili or stew, baking artisan bread (the covered pot creates steam for crispy crust), and slow-roasting large cuts.
Budget guidance: Enameled cast iron (Le Creuset, Staub, Lodge) is the gold standard. Lodge enameled Dutch ovens ($50–70) perform well, mid-range options like Cuisinart ($80–120) provide excellent value, while premium Le Creuset ($300–400) are heirloom pieces that last generations.
Part 4 Summary: Four pieces of cookware handle virtually everything: stainless steel skillet (browning, searing), nonstick skillet (eggs, delicate foods), saucepan (sauces, grains, reheating), stockpot (pasta, stock, large batches), and Dutch oven (braising, one-pot meals, bread). Heavy bottom construction is the most important quality marker. Avoid complete sets—buy pieces individually based on actual need.
Part 5: Measuring Tools and Prep Equipment
Accuracy and Efficiency in Food Preparation
Proper measuring tools ensure recipe success, particularly in baking where precision matters. Beyond measurement, a few key prep tools make cooking significantly more efficient and enjoyable.
Measuring Cups and Spoons
You need both dry measuring cups (for flour, sugar, grains) and liquid measuring cups (for water, milk, oil, stock)—they’re not interchangeable.
Dry measuring cups: Nested cups in standard sizes (1 cup, 1/2 cup, 1/3 cup, 1/4 cup) designed to be filled level with the rim. Metal or plastic both work. Look for sturdy handles and clear size markings. Expect $10–15 for a quality set.
Liquid measuring cups: Clear cups with measurement markings and a spout for pouring. You need at least two sizes: 1-cup and 2-cup (or 4-cup). Glass (Pyrex) or plastic both work; glass is more durable and microwave-safe. Look for clear markings visible from above. Expect $5–10 per cup.
Measuring spoons: Nested spoons in standard sizes (1 tablespoon, 1 teaspoon, 1/2 teaspoon, 1/4 teaspoon). Metal is more durable than plastic. Look for narrow, elongated bowls that fit into spice jars easily. Expect $8–12 for a quality set.
Digital Kitchen Scale
Kitchen Scale: A device that measures ingredient weight in grams or ounces rather than volume. Weight measurements are more accurate than volume measurements, particularly for flour and other dry ingredients where measuring technique significantly affects quantity. Professional bakers weigh ingredients exclusively.
A cup of flour can vary by 30% depending on how you scoop it—weighing flour eliminates this variability. Look for capacity of at least 11 pounds, accuracy to 1 gram, tare function (zeros out the scale with a bowl on it), and a flat surface. Expect $15–30 for a quality digital scale.
Instant-Read Thermometer
Instant-Read Thermometer: A probe thermometer that displays food temperature within seconds, enabling accurate doneness determination for proteins and other temperature-sensitive foods. This is the single most important tool for cooking meat and poultry properly—appearance and timing are unreliable; temperature is definitive.
Look for reading time under 10 seconds (preferably 2–3 seconds), temperature range from 32°F to 450°F, accuracy within 1–2 degrees, waterproof construction, and a backlit display. The Thermapen (about $100) is the professional standard. Excellent budget alternatives include ThermoWorks ThermoPop ($30) or Lavatools Javelin ($25).
Essential Prep Tools
Essential prep tools include: vegetable peeler for efficient peeling, box grater offering multiple grating sizes, colander for draining pasta and washing produce, reliable can opener, spring-loaded tongs (9–12 inches) for safe handling of hot food, wooden spoons that won’t scratch pans, heat-resistant silicone spatula for scraping bowls, ladle for serving soups and sauces, and whisk for mixing and incorporating air. Budget $75–125 total for quality versions of all these prep essentials.
Part 5 Summary: Measuring accuracy requires both dry cups (filled level) and liquid cups (clear with spout)—they’re not interchangeable. A kitchen scale eliminates flour measurement variability. An instant-read thermometer is essential for safe, properly cooked proteins. Essential prep tools (peeler, grater, colander, tongs, spoons, spatula, ladle, whisk) handle daily prep tasks efficiently.
Part 6: What You Don’t Need (Yet)
Resisting Kitchen Gadget Temptation
Kitchen stores want you to believe you need specialized tools for every task. In reality, most single-purpose gadgets are unnecessary, taking up drawer space while performing tasks your existing tools handle adequately.
Garlic press: A chef’s knife minces garlic effectively with proper technique, which we’ll cover in our course on mincing aromatics. Presses are difficult to clean and most create pulpy rather than finely minced garlic.
Unitaskers (avocado slicers, strawberry hullers, egg separators, banana slicers): These perform single tasks that knives or spoons handle perfectly well. They clutter drawers while saving minimal time.
Complete knife blocks or cookware sets: Sets include pieces you’ll never use to make the set seem like better value. Buy pieces individually as you need them—you’ll spend less and have exactly what you actually use.
Electric knife sharpeners: Most remove too much metal and create uneven edges. Professional sharpening services or quality whetstones serve better. A honing steel is more useful for daily maintenance.
Expensive appliances before mastering basics: Stand mixers, food processors, immersion blenders, and other appliances are valuable once you’ve mastered fundamental techniques and know you’ll use them regularly. But they’re not essential for learning to cook. Start with basics, develop skills, then add appliances that enhance techniques you’ve already mastered.
Part 6 Summary: Resist single-purpose gadgets that duplicate knife or spoon functions. Avoid complete sets that include unused pieces. Skip electric sharpeners in favor of professional sharpening. Delay appliance purchases until you’ve mastered fundamentals and know you’ll use them regularly. Quality basics outperform gadget collections.
Complete Starter Kitchen Equipment List
| Tool | Key Specification | Est. Price Range |
| Chef’s Knife | 8–10 inch, Full Tang | $30–$200 |
| Paring Knife | 3–4 inch blade | $10–$15 |
| Serrated Bread Knife | 8–10 inch, pointed serrations | $15–$25 |
| Honing Steel | 10+ inch length | $15–$30 |
| Large Cutting Board | 12×18 inch, 3/4 inch thick | $25–$80 |
| Skillet (Stainless Steel) | 10–12 inch, heavy bottom | $50–$100 |
| Skillet (Nonstick) | 10–12 inch | $20–$40 |
| Saucepan | 3–4 quart, heavy bottom, lid | $40–$80 |
| Stockpot | 8 quart minimum, lid | $30–$60 |
| Dutch Oven | 5–7 quart, enameled cast iron | $50–$400 |
| Measuring Cups & Spoons | Dry set, liquid cups, spoon set | $25–$45 |
| Digital Kitchen Scale | 11 lb capacity, 1g accuracy, tare | $15–$30 |
| Mixing Bowls | Set of 3–5, graduated sizes | $20–$40 |
| Instant-Read Thermometer | 2–10 second read time, waterproof | $25–$100 |
| Essential Prep Tools | Peeler, grater, colander, tongs, spoons, spatula, ladle, whisk | $75–$125 |
| TOTAL (Core Kit) | Everything listed above | $350–$900 |
Troubleshooting: Common Equipment Problems
| Problem | Cause and Solution |
| Knife feels dull after only a few uses | Edge has bent microscopically, not actually dulled. Solution: Use honing steel before each cooking session (10–15 seconds). True sharpening needed only every few months with regular honing. |
| Cutting board slides during cutting | Board lacks weight or friction against counter. Solution: Place damp towel or non-slip mat under cutting board. Consider heavier board if problem persists. |
| Food sticks to stainless steel pan | Pan not properly preheated or food added before oil was hot. Solution: Preheat pan over medium heat 2–3 minutes, add oil, wait until oil shimmers before adding food. Food releases naturally when properly seared. |
| Nonstick coating degrading quickly | Heat too high or metal utensils damaging coating. Solution: Use medium heat maximum for nonstick, use only wooden or silicone utensils, hand wash rather than dishwasher. Replace when coating shows wear. |
| Food burns in spots while raw in others | Pan has hot spots from thin construction. Solution: Use heavy-bottom cookware that distributes heat evenly. If stuck with thin pan, use lower heat and move food frequently. |
| Recipes don’t turn out despite following measurements | Measuring technique inconsistent, especially for flour. Solution: Use kitchen scale for baking (weight is more accurate than volume). For volume measuring, use proper technique: spoon-and-level for dry, eye-level for liquid. |
| Thermometer gives inconsistent readings | Probe not inserted properly or thermometer needs calibration. Solution: Insert into thickest part of food, avoiding bone. Test accuracy in ice water (should read 32°F) and boiling water (should read 212°F at sea level). |
| Wood cutting board cracking or warping | Board dried out or exposed to excessive moisture. Solution: Oil board regularly with food-grade mineral oil (every few weeks), never soak or put in dishwasher, dry immediately after washing, store flat. |
Success Metrics: Are You Ready for course 3?
You are ready to progress to course 3 (Setting Up Your Kitchen Workspace) when you can:
- Apply the three criteria (necessity, versatility, frequency) to evaluate any kitchen tool purchase
- Identify quality markers in knives (full tang, balanced weight) and cookware (heavy bottom construction)
- Name the three essential knives and explain when each is used
- Explain the difference between honing (edge realignment) and sharpening (metal removal)
- State minimum cutting board size (12×18 inches) and explain wood vs. plastic tradeoffs
- Describe the four essential cookware pieces and their primary uses
- Explain why dry and liquid measuring cups are not interchangeable
- Identify at least three unnecessary gadgets and explain why basic tools handle those tasks
Skill Dependencies: What This course Enables
- Course 3: Setting Up Your Kitchen Workspace teaches you how to organize and position the tools covered here for maximum efficiency. Tool selection precedes tool organization.
- Courses 6–10: Knife Skills Series (knife holding, chopping, dicing, mincing, slicing) all require the chef’s knife, paring knife, and cutting board covered here. Proper tools enable proper technique development.
- Course 4: Understanding Stove and Oven Controls teaches heat management using the cookware you’ve selected. Understanding your pans’ heat properties enables effective temperature control.
- Course 14: Measuring Ingredients Accurately builds on the measuring tools covered here, teaching proper technique for both volume and weight measurement.
- All Cooking Technique Courses: From sautéing to braising to roasting, every cooking method uses the cookware and tools introduced here. Equipment knowledge is prerequisite to technique mastery.
Key Takeaways: Essential Equipment Fundamentals
| Concept | Key Points |
| Tool Philosophy | Quality over quantity • Versatility over specialization • Three criteria: necessity, versatility, frequency • Professional kitchens use limited, versatile tools |
| Essential Knives | Chef’s knife (8–10 inch, 90% of tasks) • Paring knife (3–4 inch, precision) • Serrated bread knife (crusty/soft foods) • Honing steel (edge maintenance) |
| Quality Markers | Knives: full tang, balanced weight, quality steel • Cookware: heavy bottom, appropriate material • Cutting boards: adequate size, stable weight |
| Cutting Boards | Minimum 12×18 inches • 3/4 inch thick minimum • Wood for knife care • Plastic for raw proteins • Own both types |
| Essential Cookware | Stainless skillet (browning) • Nonstick skillet (delicate foods) • Saucepan 3–4 qt • Stockpot 8 qt • Dutch oven (braising) |
| Measuring Tools | Dry cups (filled level) • Liquid cups (clear, spout) • Not interchangeable • Scale for accuracy • Thermometer essential for proteins |
| What to Skip | Garlic press • Unitaskers • Complete sets • Electric sharpeners • Appliances before mastering basics |
Conclusion: Tools That Enable Mastery
The equipment covered in this course represents your foundation—the tools that enable proper technique rather than fighting against it. At Chefts, we believe in understanding why you need each tool, not just adding items to a shopping cart. Every tool recommended here serves multiple purposes, will be used regularly, and enables techniques we’ll teach throughout the curriculum.
Start by acquiring the absolute essentials: one quality chef’s knife, a paring knife, a serrated bread knife, a honing steel, a large cutting board, a 10–12 inch skillet (stainless steel), a 3–4 quart saucepan, an 8-quart stockpot, measuring cups and spoons, and an instant-read thermometer. This core set enables every basic cooking technique and costs $200–400 total if you shop strategically. Add the Dutch oven and nonstick skillet when budget allows.
Prioritize quality where it matters: Your chef’s knife is worth investing in because you’ll use it every single time you cook. Your cutting board should be large and stable. Your skillet should have heavy-bottom construction. But your stockpot, measuring cups, and mixing bowls don’t require premium versions—mid-range options perform identically to expensive ones.
Remember that tools enable technique but don’t replace it. The most expensive knife in the world doesn’t automatically make you a skilled cook—proper grip, control, and knife handling do. The best pan available won’t fix poor heat management. As you progress through Chefts, you’ll learn to extract maximum performance from whatever tools you have. That’s the difference between buying equipment and building competence.
This is the Chefts promise: we teach you to think strategically about your kitchen setup, investing wisely in tools that compound your growing skills. Welcome to your properly equipped kitchen. Now let’s learn to use these tools with confidence and skill.