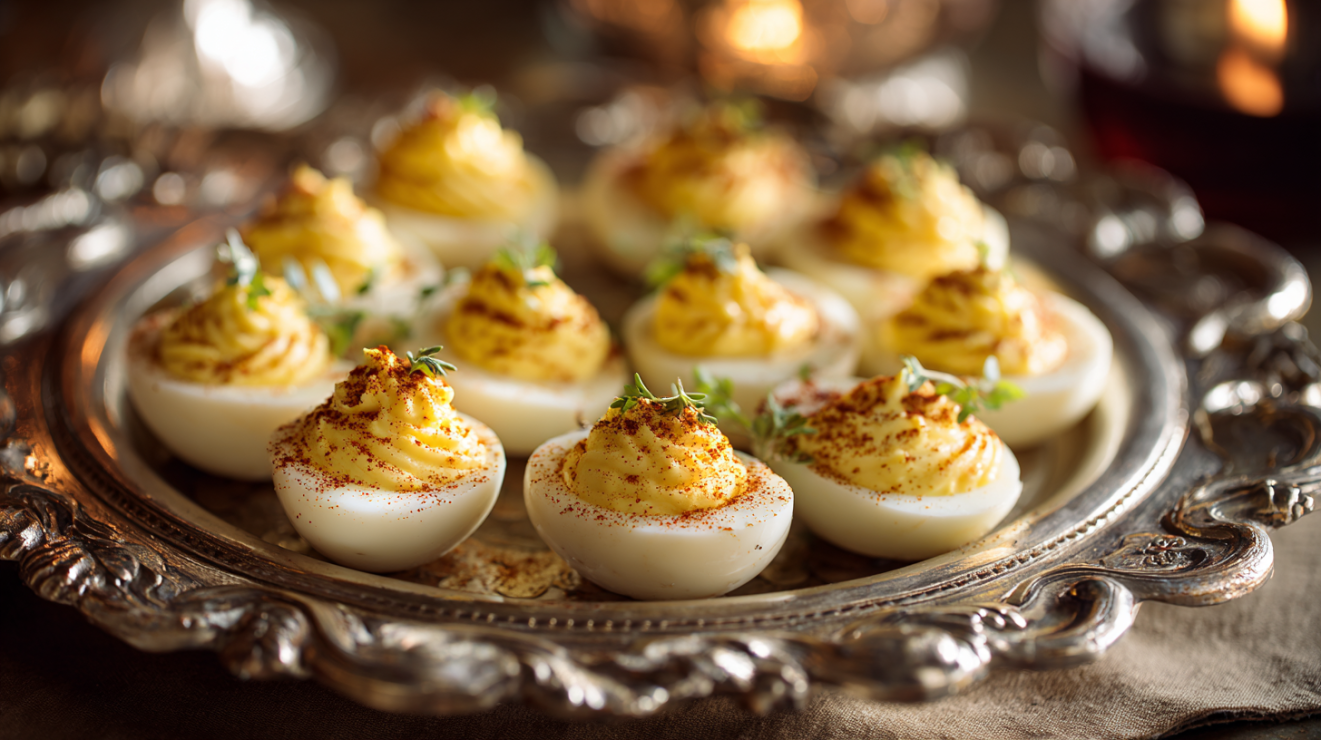
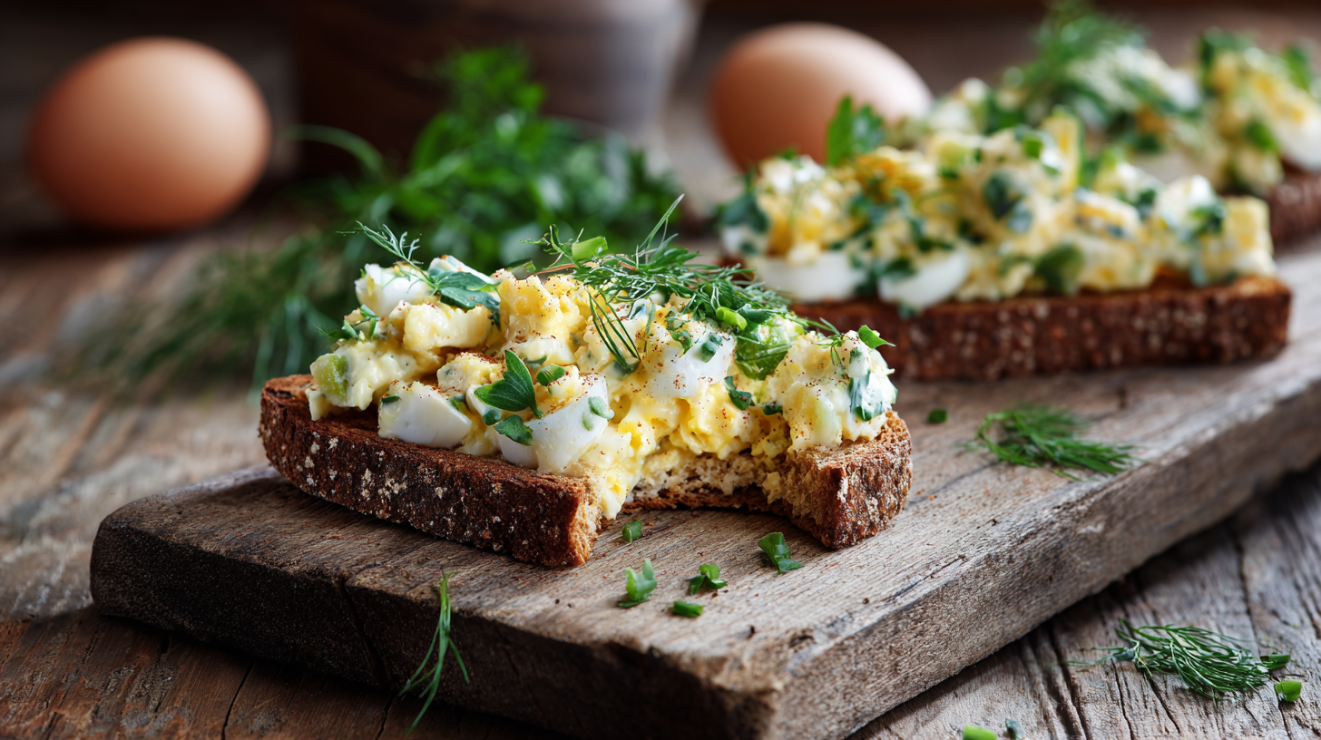
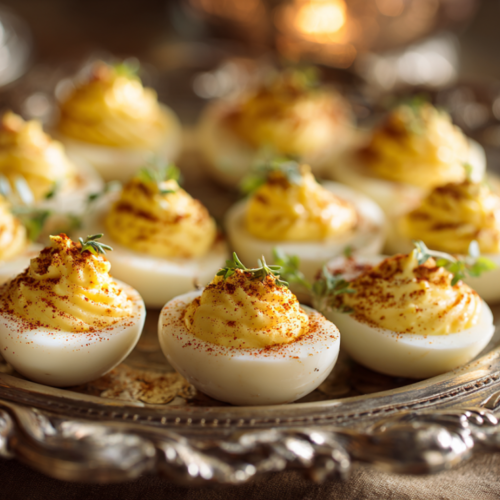
Deviled quail eggs are delicate, one-bite Southern appetizers that transform the beloved deviled egg into an elegant hors d’oeuvre worthy of the finest cocktail hour. The secret lies in precise timing—exactly 2 minutes and 45 seconds in boiling water creates perfectly set yolks that remain vibrant yellow, not the chalky gray of overcooked eggs. This precision matters because the smaller yolk-to-white ratio in quail eggs means overcooking by even 30 seconds pushes the yolk past its ideal texture, while undercooking leaves you with a filling that won’t emulsify properly.
I have served these at countless gatherings, from intimate dinner parties to grand receptions, and they disappear from the platter within moments. There is something irresistible about their diminutive size—guests feel they can indulge without restraint. This recipe delivers the same tangy, creamy filling you expect from classic deviled eggs, scaled to perfection for these jewel-like bites.
Why This Recipe Works
The 2:45 cooking time: I tested cooking times from 2 minutes to 4 minutes in 15-second increments. At 2:45, the yolk reaches 158°F—fully set but still creamy with a vibrant yellow color. At 3:15, yolks begin developing the greenish ring that indicates iron sulfide formation at the yolk-white interface.
Room temperature eggs: Quail eggs dropped cold into boiling water crack at a rate of roughly 35%. Eggs tempered for 30 minutes crack less than 5% of the time. The thermal shock differential is simply too great for their thin shells.
Vinegar in the cooking water: The acid helps coagulate any escaping white immediately if a shell cracks, minimizing loss. This is the same principle used in poaching—what the French call coagulation acide. It also slightly softens the shell, making peeling marginally easier.
Duke’s mayonnaise for the filling: Duke’s contains no sugar, which means the filling maintains a pure savory profile. The higher egg yolk content compared to other brands creates superior emulsification and a richer mouthfeel. For my Roasting Vegetables and Proteins in the Oven pillar post, I explore how fat content affects texture in greater detail.
The Elegant History Behind the Humble Deviled Egg
The deviled egg traces its lineage to ancient Rome, where boiled eggs seasoned with spicy sauces appeared at banquets as a first course—the origin of our word “appetizer.” The term “deviled” emerged in 18th-century England, referring to any highly seasoned dish. By the time this preparation reached Southern tables in the early 1900s, it had evolved into the creamy, mustard-spiked version we recognize today.
Quail eggs bring a distinctly refined sensibility to this preparation. In Charleston’s finest homes, where French culinary influence merged with Southern hospitality, these smaller eggs became markers of sophistication. A hostess who served quail egg appetizers signaled both her refined palate and her attention to detail—qualities that remain as relevant today as they were a century ago.
I first encountered deviled quail eggs at a Savannah garden party in the early days of my career. The chef, a quietly brilliant woman trained in the Escoffier tradition, had piped the filling with such precision that each egg looked identical. When I asked her secret, she smiled and said, “The same care you give a consommé, you give to these.” That lesson—that technique matters at every scale—has guided my approach ever since.
This version represents years of refinement. The filling balances the richness of mayonnaise against the sharp bite of Dijon, brightened with white wine vinegar and warmed by just enough cayenne to leave a whisper of heat. It is, I believe, the definitive approach.
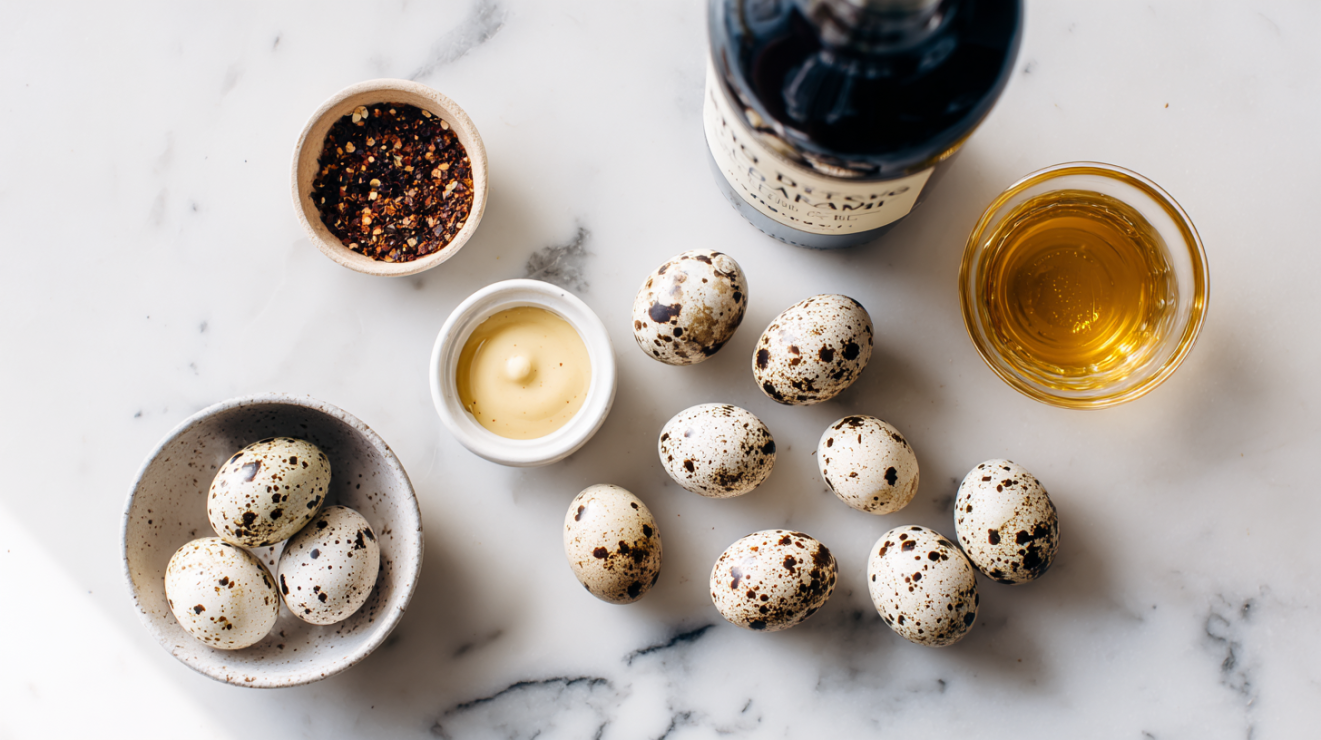
The Essential Ingredients for Perfect Deviled Quail Eggs
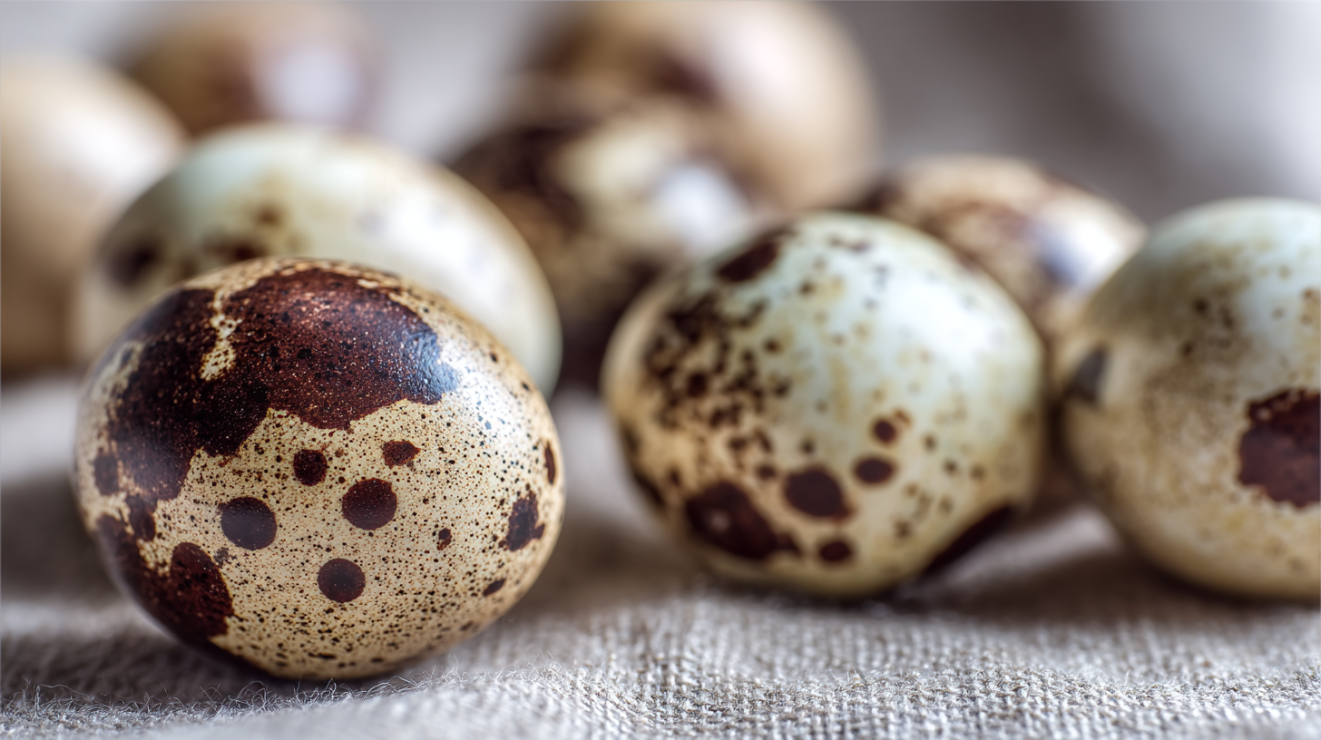
Quail Eggs (24 eggs): These petite eggs weigh approximately 9 grams each—about one-fifth the size of a chicken egg. Their flavor is slightly richer and more pronounced than chicken eggs, with a higher yolk-to-white ratio that creates intensely flavored filling. Source them from specialty grocers, farmers’ markets, or Asian supermarkets. Freshness matters tremendously: eggs less than one week old have the brightest yolks, though they peel slightly less cleanly than older eggs. If you cannot find quail eggs, you may substitute 6 chicken eggs, but understand you will lose the elegant scale that makes this preparation special.
Mayonnaise (3 tablespoons): Duke’s remains my strong preference for its tangy, sugar-free profile and superior emulsifying properties. Hellmann’s (or Best Foods west of the Rockies) works acceptably. Do not use Miracle Whip—its sweetness disrupts the savory balance entirely. For those who make mayonnaise from scratch, homemade provides exceptional results; ensure it is well-seasoned before adding. The mayonnaise serves as both binder and flavor base, so quality matters.
Dijon Mustard (1 teaspoon): True Dijon from the Burgundy region contains verjuice rather than vinegar, producing a cleaner, sharper heat. Maille or Grey Poupon both perform well. Yellow mustard provides the wrong flavor profile entirely—too sweet, too mild, too distinctly American picnic rather than elegant hors d’oeuvre. The mustard acts as an emulsifier while contributing essential piquancy.
White Wine Vinegar (1/2 teaspoon): This acid brightens the filling without adding color. Champagne vinegar substitutes beautifully if you have it on hand. Avoid red wine vinegar or balsamic—both will discolor the filling and compete with the delicate egg flavor. The acidity balances the richness of the yolk and mayonnaise. My Balancing Five Tastes: Salt, Sweet, Sour, Bitter, Umami pillar explores this interplay in depth.
Cayenne Pepper (1/8 teaspoon): This provides warmth without visible color, creating heat that registers after the initial creamy impression. Hot sauce may substitute, but adjust quantity—most hot sauces contain vinegar that will shift the overall acid balance. I find 2-3 drops of Tabasco roughly equivalent to this amount of cayenne.
Quick Substitution Guide:
- Duke’s mayonnaise → Hellmann’s or homemade (not Miracle Whip)
- Dijon mustard → Whole grain Dijon (texture change) or Creole mustard
- White wine vinegar → Champagne vinegar or fresh lemon juice
- Cayenne → Hot sauce (2-3 drops) or white pepper (milder)
- Quail eggs → Chicken eggs (6 eggs; loses elegance but maintains flavor)
Mastering the Art of Cooking and Peeling Quail Eggs
The technique for cooking quail eggs differs substantially from chicken eggs, and understanding the science behind each step transforms an inconsistent process into reliable precision.
The Boiling Stage
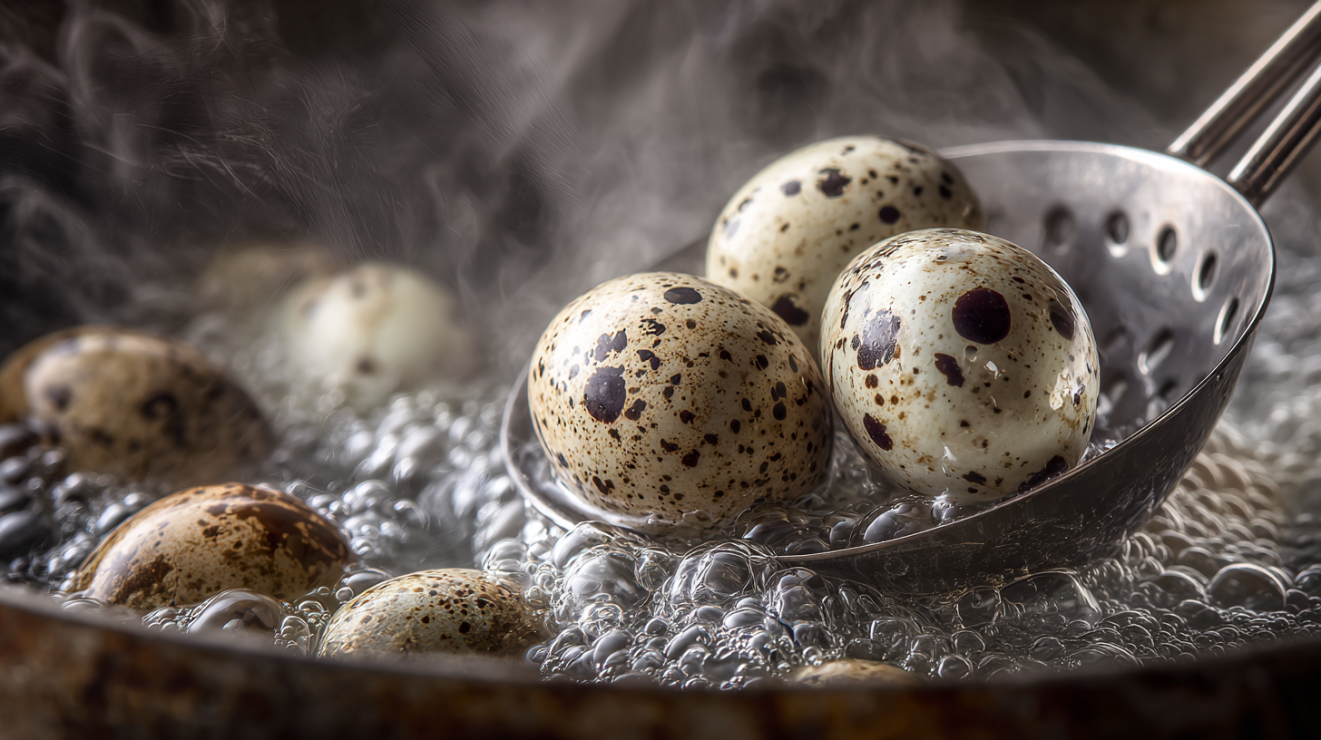
Quail eggs require a rolling boil—not a simmer, not a gentle bubble. The vigorous convection currents keep the eggs moving, promoting even cooking and helping center the yolks. According to Serious Eats’ comprehensive guide on egg cookery (https://www.seriouseats.com/the-food-lab-complete-guide-to-sous-vide-eggs), egg proteins begin coagulating at 144°F, with the white setting fully by 180°F and the yolk by 158°F. Our target of 158°F in the yolk means the white must be fully set—hence the boiling water.
You can examine the molecular changes that occur in egg proteins at these specific temperature thresholds through the Exploratorium’s science of cooking resources.
Listen for the sound: when quail eggs cook properly, you hear a gentle clicking as shells tap against each other and the pot. This movement is desirable. The timing of 2 minutes 45 seconds accounts for the small thermal mass of quail eggs—they heat through remarkably quickly compared to chicken eggs.
The Ice Bath
Immediately plunging cooked eggs into ice water accomplishes two critical tasks. First, it halts carryover cooking—the residual heat that would otherwise continue setting the yolk past its ideal point. Second, it creates thermal contraction: as the egg cools rapidly, the contents shrink away from the shell and membrane, creating a slight gap that facilitates peeling.
The ice bath must be genuinely cold—fill your bowl at least half with ice before adding water. Lukewarm water provides insufficient temperature differential. I keep eggs in the bath for a minimum of 5 minutes, though 10 minutes yields even better peeling results.
The Peeling Technique
Quail egg shells are thin and brittle, with a membrane more stubbornly attached than chicken eggs. The cracking technique matters: roll the egg gently to create a network of fine fractures rather than attempting to peel from a single point of entry. This web of cracks allows the membrane to release more evenly.
Begin peeling at the wider end where the air cell sits. You will feel a slight give where this pocket exists—that is your entry point. Peel under cool running water; the stream helps lift the membrane away from the white without tearing. Work slowly and accept that some eggs will not peel perfectly. I budget for losing 10-15% to peeling casualties—hence starting with 24 eggs to ensure 20 presentable halves.
For deeper understanding of how proteins respond to heat, consult my How Heat Transforms Food pillar post.
Common Mistakes to Avoid
Mistake: Starting with cold eggs directly from the refrigerator.
Why it fails: The 40°F temperature difference between refrigerator-cold eggs and 212°F boiling water creates thermal shock that cracks thin quail shells. The rapid expansion of air inside the shell as it heats cannot escape quickly enough.
The fix: Allow eggs to sit at room temperature for 30 minutes before cooking. Alternatively, place them in lukewarm (not hot) water for 5 minutes to take off the chill.
Mistake: Overcooking until yolks turn gray-green.
Why it fails: The iron in the yolk reacts with hydrogen sulfide from the white to form iron sulfide—that characteristic gray-green ring. Beyond aesthetics, this indicates a drier, chalkier texture that will not emulsify smoothly into the filling.
The fix: Use a timer and commit to the 2:45 cooking time. Transfer immediately to ice water—no delays.
Mistake: Peeling too aggressively or without water.
Why it fails: Quail egg whites are remarkably thin—about 60% the thickness of chicken egg whites. Dry peeling creates friction that tears the white, leaving pitted, crater-marked eggs unsuitable for elegant presentation.
The fix: Always peel under running water. Work slowly. Accept that some eggs will not survive the process—this is normal and expected even for experienced cooks.
Mistake: Making the filling too thick or too thin.
Why it fails: Too thick and the filling will not pipe smoothly; too thin and it spreads rather than holding its shape. The ratio of yolk to mayonnaise must balance the tiny volume of quail egg yolks.
The fix: Follow the measurements precisely. If filling seems thick, add mayonnaise 1/4 teaspoon at a time. If thin, press additional yolks through a strainer and incorporate.
Mistake: Serving immediately after refrigeration without tempering.
Why it fails: Cold mutes flavor perception. Refrigerator-temperature deviled eggs taste flat and dull compared to those served closer to room temperature.
The fix: Remove assembled eggs from refrigeration 15-20 minutes before serving. This allows flavors to bloom without compromising food safety.
Deviled Quail Eggs vs. Traditional Deviled Eggs
Texture: Quail eggs offer a more delicate bite—the thinner white yields more readily to the teeth, and the higher yolk-to-white ratio means each bite delivers more creamy filling relative to firm white. Traditional deviled eggs provide a more substantial eating experience with their larger whites.
Flavor Profile: Quail yolks taste richer and more intensely “eggy” than chicken yolks. This concentrated flavor means the filling, though smaller in volume, delivers comparable impact. The seasonings must be adjusted accordingly—hence the smaller quantities in this recipe.
Presentation: The diminutive size of quail eggs reads as elegant and refined. They suggest effort and attention to detail. A platter of deviled quail eggs announces a certain level of care that regular deviled eggs, however delicious, cannot match.
Timing and Complexity: Quail eggs require more precise cooking times and more patient peeling. Expect to spend roughly twice the preparation time for the same number of servings. The reward is proportional to the investment.
When and How to Serve These Elegant Bites
Deviled quail eggs belong at gatherings where presentation matters—cocktail parties, holiday receptions, wedding showers, and intimate dinner parties where you want the appetizer course to signal the care invested in the evening ahead. They are particularly suited to passed service, where guests can take them one at a time from a circulating tray.
Pair these with Champagne or dry sparkling wine; the acid and effervescence cut through the rich filling beautifully. A crisp Sauvignon Blanc works equally well. For non-alcoholic options, sparkling water with a squeeze of lemon provides similar palate-cleansing contrast. Avoid heavy reds or overly sweet beverages—they compete with rather than complement the eggs.
On the plate, these eggs pair wonderfully with other one-bite appetizers: smoked salmon on cucumber rounds, pickled shrimp, marinated olives, or thin-sliced country ham draped over melon. The key is maintaining scale—nothing on the plate should dwarf these delicate eggs. For a stunning Southern cocktail spread, include my Seasoning Basics: Salt, Pepper, and Building Flavor principles to ensure all components harmonize.
Prep Timeline
Up to 2 days ahead: Purchase quail eggs and verify freshness. Prepare the filling base (mayonnaise, mustard, vinegar, seasonings) and refrigerate in an airtight container.
Up to 1 day ahead: Boil, peel, and halve the eggs. Store whites in an airtight container lined with damp paper towels. Store yolks separately wrapped in plastic. This separation prevents the yolks from drying out.
4 hours before serving: Mash yolks and combine with filling base. Transfer to piping bag. Fill egg whites and garnish. Refrigerate assembled eggs covered.
20 minutes before serving: Remove assembled eggs from refrigeration to allow flavors to bloom at closer to room temperature.
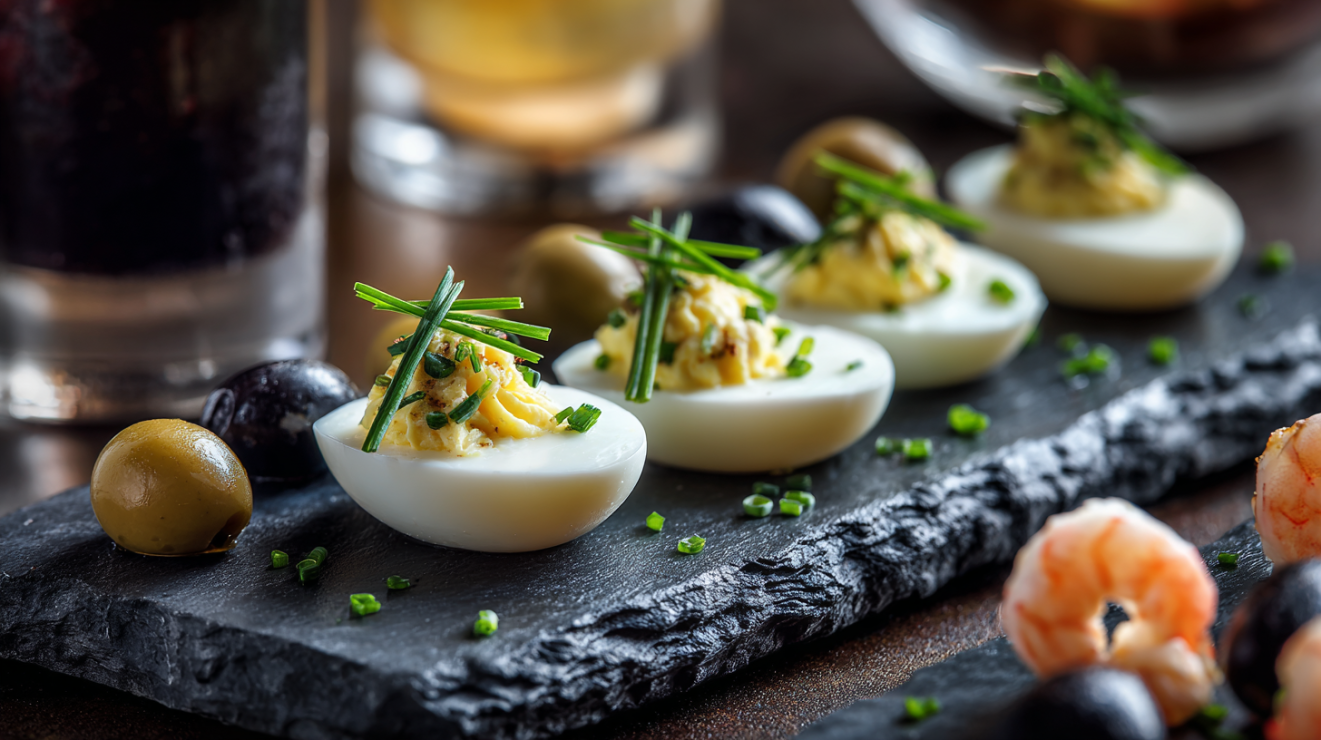
Immediately before serving: Add final garnish of smoked paprika and chives for the freshest appearance. Arrange on serving platter.
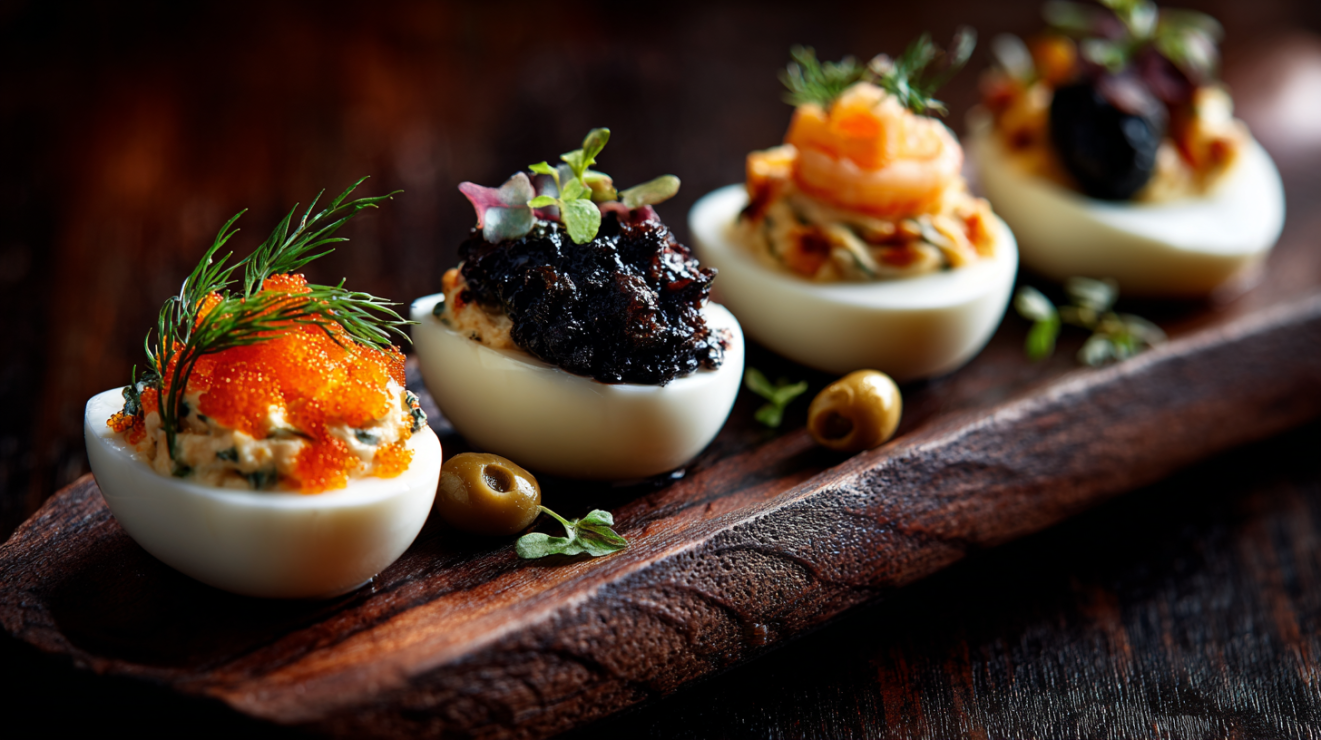
Flavor Variations to Suit Every Palate
Smoked Salmon and Dill: Fold 1 tablespoon of finely minced cold-smoked salmon into the filling along with 1 teaspoon of fresh dill. Replace the paprika garnish with a tiny salmon roe pearl atop each egg. The brininess of the salmon echoes the sea-adjacent flavors of traditional Low Country cuisine.
Truffle and Chive: Add 1/4 teaspoon of truffle oil to the filling and increase the chive garnish. Top each egg with a paper-thin slice of black truffle during truffle season, or a few drops of additional truffle oil. This variation elevates the eggs into truly luxurious territory suitable for New Year’s Eve or milestone celebrations.
Pimento Cheese: Reduce mayonnaise to 2 tablespoons and add 1 tablespoon of finely grated sharp cheddar plus 1 tablespoon of minced pimento. This creates a distinctly Southern fusion that guests adore. Omit the Dijon to let the cheese shine.
Bacon and Horseradish: Add 1 tablespoon of finely crumbled crisp bacon and 1/4 teaspoon of prepared horseradish to the filling. Garnish with additional bacon bits. The smokiness and heat create a bolder flavor profile that stands up well to whiskey-based cocktails.
Curry and Mango Chutney: Replace the Dijon with 1/2 teaspoon of quality curry powder and top each egg with a tiny dollop of mango chutney. This variation nods to the British colonial influence on Southern cuisine through the Charleston tea trade.
Proper Storage for Make-Ahead Convenience
Assembled deviled quail eggs store well for up to 24 hours in the refrigerator, though I prefer to serve them within 4-6 hours of assembly for the freshest appearance. Place them in a single layer in an airtight container, taking care not to let them touch and smudge the filling. A light tent of plastic wrap hovering just above (not touching) the filling helps prevent surface drying.
To ensure safety, always verify your storage timelines against the official cold food storage charts provided by federal health agencies.
The components store better separately. Peeled, halved whites keep beautifully for 2 days when stored in a container with damp paper towels to prevent them from drying out. The prepared filling keeps for 3 days refrigerated in an airtight container; let it come to room temperature for 15 minutes before piping to restore smooth consistency.
I do not recommend freezing deviled quail eggs. The whites become rubbery upon thawing, and the emulsified filling breaks and weeps. If you must prepare significantly in advance, freeze only the hard-boiled, peeled, unhalved eggs—they fare slightly better, though texture will still suffer.
Creative Transformations for Leftover Deviled Quail Eggs
Should you find yourself with leftover deviled quail eggs—a rarity in my experience—they transform beautifully into other preparations. Chop them roughly and fold into a small batch of egg salad with additional mayonnaise and celery. The spiced filling distributes throughout, creating a more complex egg salad than ordinary boiled eggs would yield.
Another favorite transformation: layer leftover deviled quail eggs atop a bowl of buttery grits for a decadent brunch. The creamy filling melts slightly into the warm grits, creating a rich, satisfying dish. A few drops of hot sauce and a sprinkle of fresh chives complete the picture.
For a more composed presentation, halve the leftover eggs again into quarters and arrange atop a bed of dressed greens for an elegant salad. The deviled filling serves as a built-in dressing component, requiring only a light vinaigrette on the greens themselves.
Deviled Quail Eggs (Classic Technique)
Equipment
Ingredients
For the Eggs
- 24 quail eggs at room temperature
- 1 tablespoon white vinegar
- 1 tablespoon kosher salt for cooking water
For the Filling
- 3 tablespoons mayonnaise preferably Duke's
- 1 teaspoon Dijon mustard
- 1/2 teaspoon white wine vinegar
- 1/8 teaspoon cayenne pepper
- 1/8 teaspoon fine sea salt or to taste
- 1 pinch white pepper
For Garnish
- 1 tablespoon fresh chives finely minced
- 1 teaspoon smoked paprika for dusting
Instructions
Preparing the Eggs
- Bring quail eggs to room temperature for at least 30 minutes before cooking. Cold eggs dropped into boiling water crack more frequently due to thermal shock.
- Fill a small saucepan with 3 inches of water. Add the vinegar and kosher salt, then bring to a rolling boil over high heat.
- Using a slotted spoon, gently lower quail eggs into the boiling water one at a time. Start your timer immediately: cook for exactly 2 minutes and 45 seconds for a fully set yolk that remains vibrant yellow.
- Immediately transfer eggs to an ice bath using the slotted spoon. Allow eggs to chill completely for at least 5 minutes. This stops the cooking process and creates a gap between the membrane and white for easier peeling.
Peeling the Eggs
- Gently tap each egg against the counter to crack the shell all over, creating a web of fine cracks. Roll the egg lightly between your palms to loosen the shell further.
- Beginning at the wider end where the air pocket sits, carefully peel under cool running water. The water helps lift the membrane away from the delicate white. Work slowly—quail egg whites are thin and tear easily.
Preparing the Filling
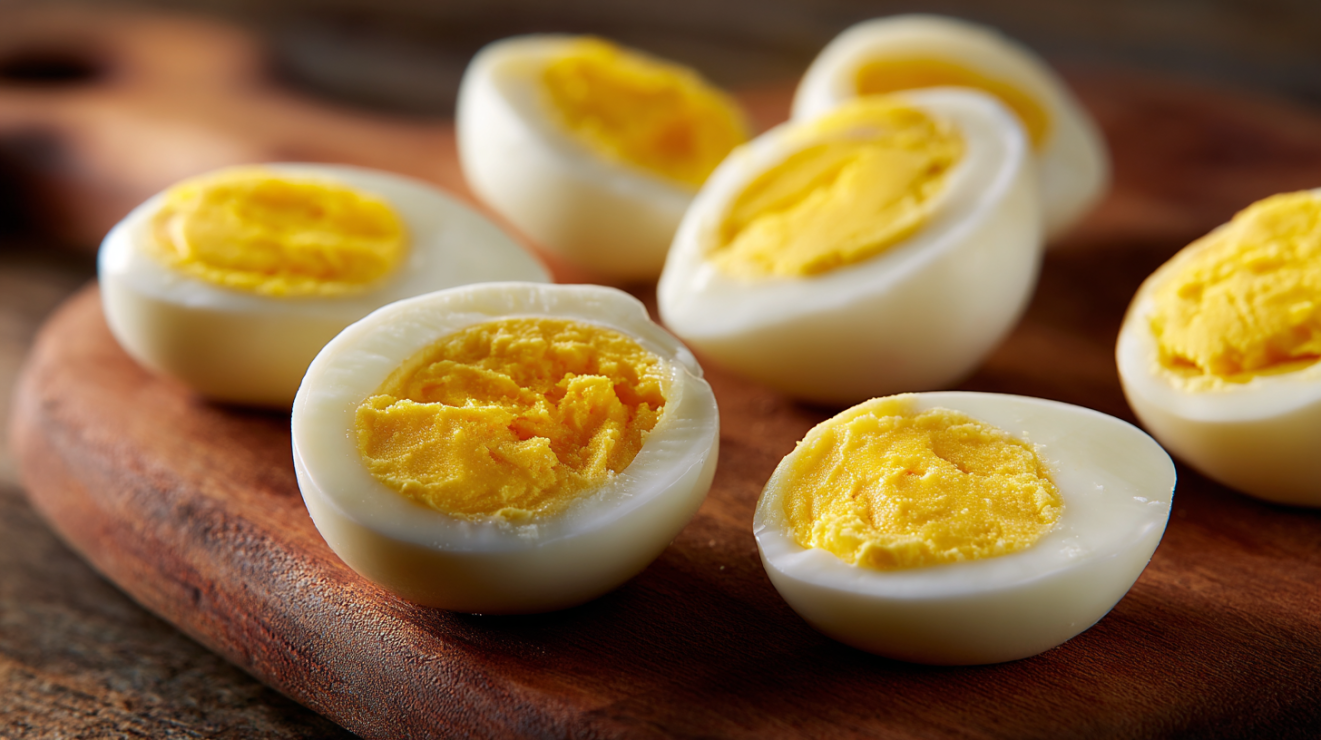
- Using a small paring knife, slice each peeled egg in half lengthwise. Gently remove the yolks and place them in a small mixing bowl. Arrange the whites cut-side up on your serving platter.
- Mash the yolks with a fork until completely smooth, with no lumps remaining. For an exceptionally silky filling, press the yolks through a fine-mesh strainer.
- Add mayonnaise, Dijon mustard, white wine vinegar, cayenne, salt, and white pepper to the yolks. Mix thoroughly until the filling is smooth and homogeneous. Taste and adjust seasoning as needed.
Filling and Garnishing
- Transfer the filling to a piping bag fitted with a small star tip. Pipe a rosette of filling into each egg white half, slightly overfilling to create an elegant mound.
- Garnish each deviled quail egg with a light dusting of smoked paprika and a few pieces of minced chives. Serve immediately or refrigerate for up to 4 hours.
Notes
Nutrition
Your Deviled Quail Egg Questions Answered
How long do you boil quail eggs for deviled eggs?
Boil quail eggs for exactly 2 minutes and 45 seconds in vigorously boiling water, then transfer immediately to an ice bath. This timing produces a fully set yolk that remains vibrant yellow—ideal for mashing into smooth filling. Even 30 seconds of overcooking begins the gray-green oxidation process that affects both appearance and texture.
Why are my quail eggs so hard to peel?
Fresh quail eggs peel more poorly than older eggs because the membrane adheres more tightly to the white. Using eggs 5-7 days old improves peeling significantly. Additionally, ensure you create a thorough network of cracks before peeling, use cool running water throughout the process, and start peeling from the air pocket at the wider end. Patience is essential—rushing causes tears.
Can I make deviled quail eggs ahead of time?
Yes, you may prepare deviled quail eggs up to 24 hours ahead, though I recommend assembling no more than 4-6 hours before serving for optimal appearance. Store assembled eggs in a single layer in an airtight container, avoiding contact between eggs. Cooked egg dishes should be refrigerated within 2 hours and consumed within 3-4 days.
What if my filling is too thick to pipe?
If the filling has stiffened from refrigeration, let it sit at room temperature for 15 minutes, then stir vigorously. If still too thick, add mayonnaise 1/4 teaspoon at a time until you achieve a smooth, pipeable consistency. The filling should hold its shape when piped but not require excessive pressure to extrude.
Where can I buy quail eggs?
Quail eggs are available at Asian supermarkets, specialty grocers like Whole Foods, and many farmers' markets. Some larger conventional grocery stores stock them in the specialty cheese or international foods section. Expect to pay $4-8 per dozen. You may also find them fresh from local quail farms—search online for farms in your area that offer direct sales.
Can I use this same technique for regular chicken eggs?
The filling ratios and seasonings scale well to chicken eggs—simply multiply ingredients by approximately 4 for 6 chicken eggs. However, the cooking time changes dramatically: chicken eggs require 10-12 minutes in boiling water for hard-boiled yolks. The peeling technique remains similar, though chicken eggs are more forgiving due to their thicker whites.
Related Techniques
From Cooking Fundamentals:
- How to Cook Perfect Eggs: Scrambled, Fried, and Boiled
- How Heat Transforms Food
- Seasoning Basics: Salt, Pepper, and Building Flavor
- Understanding Cooking Times and Temperatures
- Mise en Place: The Foundation of Cooking Success
From Gourmet Cooking:
- Balancing Five Tastes: Salt, Sweet, Sour, Bitter, Umami
- Quenelle and Shaping Technique
- Plating Composition Principles
Your Next Gathering Deserves These Elegant Bites
Mastering deviled quail eggs opens a door to elevated entertaining that impresses without overwhelming. Remember the essential principles: temper your eggs before cooking, respect the precise timing of 2 minutes 45 seconds, embrace patience during peeling, and balance your filling with care. These small steps yield results that speak for themselves on any platter.
The technique you develop here—precision cooking, gentle handling, attention to flavor balance—serves you well across countless other preparations. Whether you choose the classic version or explore the variations, these deviled quail eggs will become a signature offering in your entertaining repertoire. I cannot wait to hear how they turn out in your kitchen.